Toyota Sienna Forum - siennachat.com banner
401 - 420 of 435 Posts
I’m interested in seeing your mileage. I need dedicated winter tires here in snow country, (Toyo Observe right now) but in summer more of a gravel/ rough road tire would be fine. We rarely end up off road, but it occasionally happens. Wonder if these would do?
 
Discussion starter · #402 · (Edited)
I’m interested in seeing your mileage. I need dedicated winter tires here in snow country, (Toyo Observe right now) but in summer more of a gravel/ rough road tire would be fine. We rarely end up off road, but it occasionally happens. Wonder if these would do?
EDIT: adding the link to the Defender 2 tire upgrade post as it’s on the previous page of this thread:


—-

FWIW, this is my second set of Defender 2s (our RAV4 Hybrid AWD also has them). I also had a similar version of this tire (I think they were LTXs) on a mid-00s Jeep Wrangler Rubicon and they performed very well off highway, airing them down to ~20 PSI got the same performance I saw from other Jeeps with dedicated AT tires (BFGs, etc.). Defenders are popular with some in the Land Cruiser and Tacoma communities; there are some great threads discussing the tire on forums like IH8MUD (Land Cruiser / Toyota forum) and Tacomaworld, some googling should dig them up. That being said, I think Defenders are a great option for an AWD minivan that sees occasional dirt.

Regarding a MPG hit, I installed them on our RAV4 Hybrid AWD about two weeks into owning that vehicle (we purchased it used from the original owner). IIRC, the fuel economy dropped by ~2 MPG in town and I didn't notice a reduction on the highway. I suppose this makes sense as the Defenders are on the heavier side, thus requiring more effort to get them rolling from a stop. I remember they were 2-3 pounds heavier than the cheapo passenger tires they replaced on my RAV4. However, I think the performance improvements (traction, XL load rating, durability, ride quality, etc.) are worth the reduction in fuel economy. When loaded with our family + gear, the SL-rated Bridgestones that were previously on the Sienna were too overtaxed by the weight, at least that's how they felt to me.

As for snow, from my research online, Defenders may not be the best option - I remember reading some complaints regarding this. But snow isn't something I encounter often enough to warrant snow-friendly tires and I didn't investigate further.
 
Discussion starter · #404 · (Edited)
Front Passenger RAM / MagSafe Phone Mount and Charger

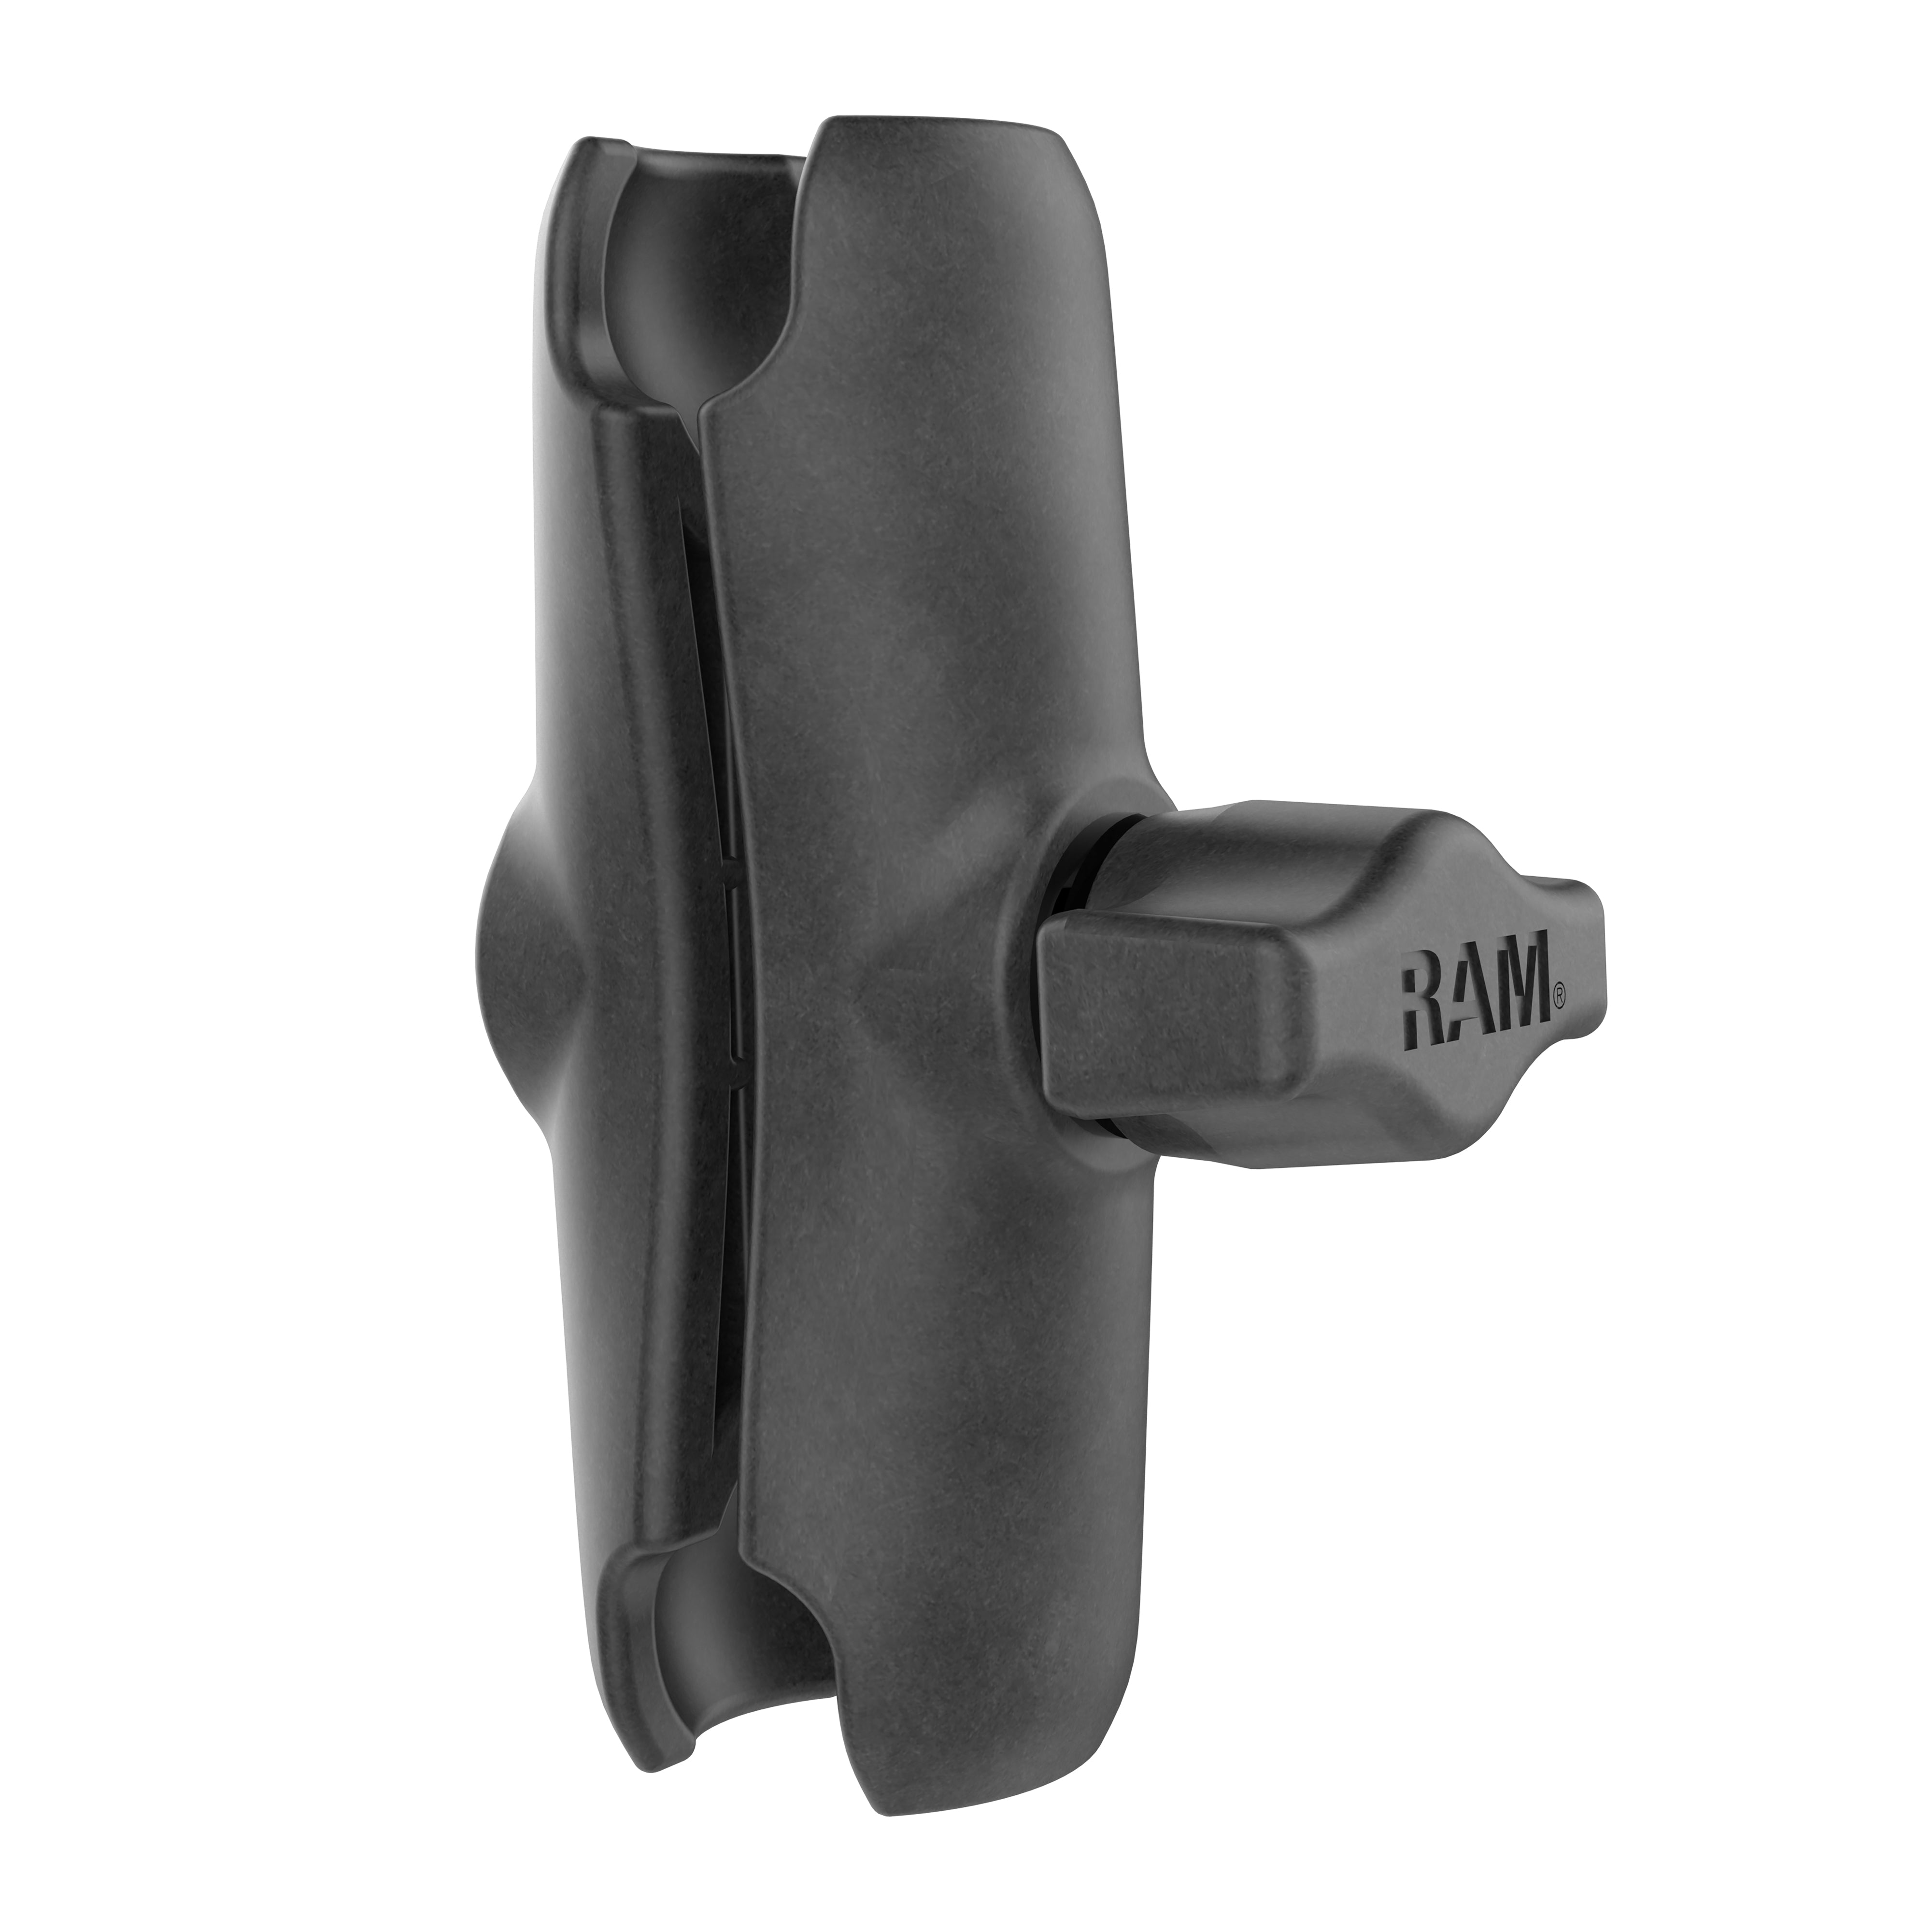
I decided to install a MagSafe phone mount and charger in the van to create a dedicated and accessible spot for my wife to place her smartphone while on the road. This setup will allow her to easily view and charge her phone when she’s in the front passenger seat - when we’re on the road, she’ll often have Waze open on her phone to help with navigation along busy streets, etc. This magnetized mount also makes attaching and removing the phone a quick, one-handed motion (no fumbling with fasteners or clamps), mirroring the driver’s side phone mount in the van.

---

Here are the parts (with product links) I chose for the installation:

Image


Image


Image


Image

MagSafe Charger (1 m)

---

After some consideration, the relatively flat spot under the center-right dash air vent was chosen to attach the mounting system. The RAM adhesive ball mount was affixed here upside down via the supplied 3M adhesive disc on its base. What's great about this mount is it's not completely rigid and can therefore bend somewhat to match the shape of the slight curve in this trim area. I then attached the medium length RAM socket arm with the MagSafe mount (and MagSafe puck) at the end.

The MagSafe charging cable was then routed around the air vent, tucked under the front dash trim, and under the center dash storage tray. I then routed the cable through one of the grommeted access holes in the side of the tray and pugged it into the CoolGear ChargeIt! 75W mini USB/USB-C speed charging device via a USB-to-USB-C adapter. Lastly, a rubber adhesive cable holder and Velcro tape were used for cable management to finish the project.

Here are the final installation photos:
Image
Image
Image
Image
Image


---

And that's it, another simple modification that provides additional utility and convenience to the vehicle.

For more information on the previously installed CoolGear ChargeIt! 75W mini USB/USB-C speed charging device and the driver's side phone mount, check out this installation write-up:


Cheers, 😎
 
Discussion starter · #405 · (Edited)
Hood Deflector - OEM Toyota Canada

A few months ago I installed an OEM Hood Deflector. This is a Toyota Canada part (Canadian-made product) that is only available within the Toyota Canada dealer network.

Please note that this write-up - and the following WeatherTech Toyota Sienna Side Window Deflector write-up - are going to be somewhat less detailed than my other thread entries as we're preparing for a big move. I was strapped for time during the installations (didn't take a lot of photos) and I'm busy now with moving logistics, so I don't have a lot of time to write a step-by-step how-to. The good thing is both of these products have detailed instructions that make the jobs fairly easy.

Here is the part number for the Toyota OEM Hood Deflector. I ordered it from Toyota Northwest Edmonton (phone: (780)478-8300):
Image


*I'll add that after installing this deflector on my Sienna, I decided to order one for our RAV4 as I really like the fit/finish of this OEM part. The tech rep I spoke with at the parts department within Toyota Northwest Edmonton said that they are no longer shipping hood deflectors to the USA as too many were damaged in transit - take that for what it's worth and this was around September 2024 when I spoke to him over the phone.

---

Here are the installation details and photos that I was able to capture.

Before I get started, big thanks to Rodney @Shinkansen for providing a digital copy of the Toyota OEM Hood Deflector Installation Instructions. The deflector I received came with no instructions, so these were extremely helpful given the tedious natural of this part's install.

Instructions link: https://cdn.shopify.com/s/files/1/1191/6498/files/SIEHYB21_HDI.pdf?v=1614358735

---

First, before installing the hood deflector, I decided to lay a layer of gloss black 3M vinyl automotive wrap along the leading edge of the hood roughly even with gap in the silver trim pieces above the headlamps. This is unique to my install. I wrapped the front portion of the hood to cover up a small (roughly 1/2" long and 1/8” wide) chip in the hood's painted finish.

Backstory: in the fall of 2023, I dropped some family off at the San Francisco airport. Upon leaving the airport I merged onto the highway and a car in front of me kicked up what appeared to be a piece of aluminum debris that was on the pavement. Unfortunately, there was no way to avoid it and this piece of metal hit the front of my hood, cutting through the 3M paint protection film (PPF), while also chipping the paint and denting the hood's aluminum sheet metal. A local paintless dent repair (PDR) technician was able to pop out the dent. I then carefully filled in the paint chip with OEM touch-up paint and had a new layer of PPF installed. Although the repair was really good, like all paint touch-ups, it was not a 100% paint match. To remedy this aesthetic blemish, I decided to wrap the front of the hood.

Here's the final result. It was my first time applying automotive 3M wrap. I watched a few how-to videos and gave it a shot. The final product turned out really clean and I think it ties in well with the front gloss black portion of the van's grill for a sportier look (please excuse the hastily snapped photos).
Image
Image
Image
Image
Image


I trimmed the edge under the hood with some 3M red reflective 3/4" vinyl tape that Inhad laying around. This is the same 3M product I applied here on the van's inner doors and rear lift gate; link here: https://www.siennachat.com/posts/443877/

I did this mainly to conceal the cut edge of the vinyl, which wasn’t as uniform as I’d like it to be. It also offers some functionality as it’s reflective and my thought is it will offer increased low light visibility if the van is ever broken down on the side of the road.
Image


---

I then let the vinyl wrap fully cure for a few days and installed the hood deflector on top of it. As others have noted on this forum, installing the OEM hood deflector is a time-consuming job. I think it took me ~3 hours from start to finish. The little adhesive anti-abrasion buffers and mounting pads require lots of measuring - luckily Toyota supplies a paper measuring tape (in millimeters) that is attached to the central metal mounting bracket and then used as a reference point for mounting each buffer pad (seen in the below photos).

I also took some advice from those before me and laid a wide red picnic blanket over top of the engine bay to catch any hardware or clips that I dropped during the install (to prevent them from being lost in the engine bay) - this was a huge help.
Image


Here are the install photos:
Image
Image
 
Hey there @yonah !!!

Great job on the installation of both the 3M Gloss Black wrap and Hood Deflector !!!

The quality and fitment of this Canadian version beats any aftermarket version that I have seen.

Sits close to the hood without any rattling or rubbing against the surface.

Image


Keep up your Great Build !!!

- Rodney
 
Mobile phone and BadElf GPS receiver hardwired charger/mount (Part #2):
Good day Yonah,

I followed your example and added the proclip mount today, replacing a mount that would droop over time. Very pleased with it's sturdiness although I have yet to drive with it installed.

I wanted to share a likely useless piece of information as so much time has passed, but after pulling the screen, I found the cables had enough slack to just flip the screen over on top of the dash to get it out of the way.

Image


I also was able to pull the leather wrapped trim up and get the clip to wedge over the bottom and top by carefully pressing on the bottom portion of the clip to force it up and over. Sliding it almost caused the leather to bunch up.

Image


I look forward to sturdiness in the future! As I am just using my USB C for CarPlay the non powered option works for me. Thanks for your motivative and informative posts!

Image
 
Discussion starter · #410 ·
Good day Yonah,

I followed your example and added the proclip mount today, replacing a mount that would droop over time. Very pleased with it's sturdiness although I have yet to drive with it installed.

I wanted to share a likely useless piece of information as so much time has passed, but after pulling the screen, I found the cables had enough slack to just flip the screen over on top of the dash to get it out of the way.

View attachment 72429

I also was able to pull the leather wrapped trim up and get the clip to wedge over the bottom and top by carefully pressing on the bottom portion of the clip to force it up and over. Sliding it almost caused the leather to bunch up.

View attachment 72430

I look forward to sturdiness in the future! As I am just using my USB C for CarPlay the non powered option works for me. Thanks for your motivative and informative posts!

View attachment 72431
Nice work and thank you for sharing the tip to not unplug the head unit's connectors. I'll be sure to link this post in my original write-up.

You'll love the ProClip mount. It's solid and the best phone/device mount for the 4th Gen Sienna.

For anyone looking for more information regarding this product and the write-up in question, here's the link: https://www.siennachat.com/posts/438727/

Super solid, no issue with movement or drops, the MagSafe compatible mount works so well I got the version for my wife’s CX-5 as she normally dumps her phone in a cup holder, so hopefully she enjoys it!

Have a good weekend!
 
Discussion starter · #412 · (Edited)
Weathertech Side Window Deflectors

I installed Weathertech's side window deflectors a few months ago around the same time as the OEM hood deflector. I think they complete the look, match the low-profile aesthetics of the OEM hood deflector, and offer some additional functionality - which is slightly reduced wind noise at highway speeds and the ability to crack the van's windows ~1.5-2" without the fear of water intrusion.

Product link:
Weathertech 2021+ Toyota Sienna Side Window Deflectors

I do not have much to add given the install, as it's fairly easy. Below are photographs of the instructions and YouTube install videos direct from Weathertech:

Image
Image


Front install video:
WeatherTech Side Window Deflectors: Front Installation

Rear install video:
WeatherTech Side Window Deflector: Rear Installation with Channel Clips and Adhesive

Here are some photos of the installation. One tip I have is to use the supplied adhesive warning labels as temporary markers to aid in the proper placement of the in-channel support clips within the rear window weatherstripping.

Image
Image
Image


Installed photos:
Image
Image
Image
Image


I enjoy being able to crack the windows in the rain to add some fresh air to the vehicle. I managed to snap a photo of this during our dreary trip to Yosemite NP :)
Image


Cheers,

😎🍻
 
Discussion starter · #413 · (Edited)
We just completed a ~3,500 mile cross country road trip and spent a lot of our time in the American Southwest.

It was a fun trip. The Sienna was loaded heavy with passengers and lots gear, yet the van handled the trip like a champ.


I’ll get some more details and photos up soon - here’s one of my favorite photos of the Sienna driving the dirt backroads in Sedona, AZ 🌵🏜

Image


😎 :coffee:

Full write-up/photos here: https://www.siennachat.com/posts/492990/
 
Hood Deflector - OEM Toyota Canada


*I'll add that after installing this deflector on my Sienna, I decided to order one for our RAV4 as I really like the fit/finish of this OEM part. The tech rep I spoke with at the parts department within Toyota Northwest Edmonton said that they are no longer shipping hood deflectors to the USA as too many were damaged in transit - take that for what it's worth and this was around September 2024 when I spoke to him over the phone.
Good day Yonah, Imitation is flattery right? We are going on a trip from San Diego to the Midwest and back, I do plenty of highway driving so if this can help chip damage and bug guts it will be worth it to me.

I just ordered the Sienna kit from Country Hills Toyota in Calgary, other dealerships wouldn't ship to me. Country Hills said part was 150 CAD and shipping was 100 CAD which comes to approximately 181 USD.

I feel like they may have taken me for a bath but no other dealership would send it or they didn't respond. I'll reply when in receipt if it's in good working order and share pictures.
 
With the driver seat completed, I moved over to the passenger side.
An ingenious feature of the Seat Jackers is a threaded hole at the leading edge of the bottom shim. Desert Does It offers a line of mounting panels that utilize these holes to facilitate additional storage in the dead space directly in front of the seat. This is not something I’m going to pursue right now, but may explore in the future:
Also, a big thanks to the guys at Desert Does It for answering my questions along the way.
Cheers,
☕ 😎
I had no idea about the seat jackers but I always found myself slipping forward in my 2022 Sienna XSE seats. This is even after lifting the front seat to the max. I am not a tall guy by any measure at 5'9 but the seating position i.e., the feeling of sliding forward and having to consciously pull yourself to remain in the seat and not slide forward was less than comfortable especially on long drives.

So, I just pulled the trigger on these after seeing what you did. My only concern is the angular stress on the rear bolts of the seat as the front end will be sitting at an angle which will make the rear bolts go in an angle instead of 90 degree angle. Otherwise I am wxcited to see what it does when I finally get the jackers.
 
Discussion starter · #416 · (Edited)
Good day Yonah, Imitation is flattery right? We are going on a trip from San Diego to the Midwest and back, I do plenty of highway driving so if this can help chip damage and bug guts it will be worth it to me.

I just ordered the Sienna kit from Country Hills Toyota in Calgary, other dealerships wouldn't ship to me. Country Hills said part was 150 CAD and shipping was 100 CAD which comes to approximately 181 USD.

I feel like they may have taken me for a bath but no other dealership would send it or they didn't respond. I'll reply when in receipt if it's in good working order and share pictures.
Glad you were able to source the OEM deflector, @Fattypros

Let's stay connected to make sure you get it installed correctly.

I had no idea about the seat jackers but I always found myself slipping forward in my 2022 Sienna XSE seats. This is even after lifting the front seat to the max. I am not a tall guy by any measure at 5'9 but the seating position i.e., the feeling of sliding forward and having to consciously pull yourself to remain in the seat and not slide forward was less than comfortable especially on long drives.

So, I just pulled the trigger on these after seeing what you did. My only concern is the angular stress on the rear bolts of the seat as the front end will be sitting at an angle which will make the rear bolts go in an angle instead of 90 degree angle. Otherwise I am wxcited to see what it does when I finally get the jackers.
I'm a big fan of the Seat Jackers. I don't think I updated the thread after doing this, but I installed a second set under the rear portion of the front passenger seat. I only installed two shims, so there's three in the front and two in the back. This lifted the entire seat and maintained the slight rearward rake. My wife prefers the new seating position as it provides a more comfortable resting angle for her legs.

I know what you mean regarding the rear mounting bolts. I remember examining the rear bolts after installing the Seat Jackers in our van and coming to the conclusion that the bolts were still square to the body of the van. This would be a good question for Desert Does It's customer service/tech line.
 
Photos of the passenger side air line routing through 12v battery compartment, rear cargo/trunk area (under the rear trim), and under the rear spare tire compartment.
View attachment 65398 View attachment 65399 View attachment 65400 View attachment 65401 View attachment 65402

Air lines routed to the ARB Linx's air manifold/solenoids.
View attachment 65403

Once both bags are installed and air lines plumbed, double check your wheel lug nut torque specs one final time. I found it helpful to drive a couple of miles to fully seat/position the airbags within the coil springs. I inflated/deflated them a couple of times from 5-35 psi to test everything out and ensure they were fully seated. A good visual inspection from under the van is also a good idea to verify everything looks correct and that the upper protective pucks/pads are still centered.

Some photos of the Linx control unit's Air Suspension menu. The first photo is of the "Daily Cargo" setting I created and set to 10 psi for everyday driving. The second photo is of the additional preset settings that go up to 35 psi for the heaviest, "Hitch Cargo" setting.
View attachment 65404 View attachment 65405

At this point, the installation is complete. Keep in mind that whenever you load your van with heavier than normal cargo, it’s preferable to inflate the airbags before you load those items in the van.
@yonah I did an installation a year ago following your guide and recently had a leak in the tubing - about an inch above the airbag connection. There was some pretty severe kinking right at the connection and about an inch above. Have you had any issues with kinking or thoughts on how to improve that when I replace the tubing?
 
Discussion starter · #418 ·
@yonah I did an installation a year ago following your guide and recently had a leak in the tubing - about an inch above the airbag connection. There was some pretty severe kinking right at the connection and about an inch above. Have you had any issues with kinking or thoughts on how to improve that when I replace the tubing?
I experienced a failure in the system around 11k miles post-install. More details/photos can be found here in this update to the original airbag install write-up:

I have put almost 15k miles and a cross-country trip on the van since this improvement to my airbag setup without issue. The system is performing flawlessly.

Regarding the kink in your airline when orienting the airbags in the upward position, I think (assuming you are using the Firestone-supplied airline), the remedy would be to forgo the softer/thinner-walled airline supplied by Firestone for a thicker-walled Nylon airline. Check my write-up; I'm almost certain I provided an Amazon link to the specific airline I used in my installation. This more rigid line is more durable and less prone to kinking.
 
Discussion starter · #419 · (Edited)
Cross Country Road Trip #2

CA Central Coast -> Northern AL
~3,500 miles
Avg. MPG: 30.2

Image


States visited:
-CA
-AZ
-NM
-CO
-KS
-MO
-IL
-KY
-TN
-NC
-GA
-AL

---

Life has been very busy as of late, so this update is long overdue. A few months ago, we moved back to the East Coast and took the Sienna on another cross-country road trip. Our last drive across the continental US took place in spring 2023 (link to the details: https://www.siennachat.com/posts/446797/ )

For this trip, we decided to take the southern route through the heart of the American Southwest to avoid adverse winter weather to the north.

The Sienna was loaded down with our big family and all of the gear required to keep things moving on the road with young kids. To free up the interior of the van and expand the vehicle's cargo space, the Sienna was configured with the rooftop and hitch-mounted cargo boxes for this trip. Links to both can be found here:
Despite being loaded down with around 1,300+ pounds of payload (passengers and cargo), the van still managed to achieve 30 MPGs. Note, to aid the van in carrying this amount of weight, I installed Sumo Springs (front), Firestone Airbags (35 PSI) (rear), and upgraded the vehicle's tires to XL-rated Michelin Defender 2 tires (inflated to 40 PSI (front) / 45 PSI (rear). These upgrades greatly improved the van's handling and road manners while loaded. Links to the write-ups/details are here:
As the van was ~30k miles at the start of the trip, I swapped in a new set of cabin and engine air filters. The old units were getting a little dingy. I also cleaned the hybrid intake filters (not pictured).
Image
Image


---

All in all, whether on pavement or off, the Sienna performed flawlessly and handled the increased payload very well. We're about to hit 35k miles with this van and I'm very pleased with its performance and reliability thus far.

Below are some photos from the trip. Enjoy 😎 ☕

---

Mojave Desert (SoCal):
Image


Joshua Tree NP:
Image
Image


Grand Canyon (South Rim):
Image
Image


Sedona, AZ:
Image


Red Rocks Secret Mountain Wilderness (Sedona, AZ):
Image
 
401 - 420 of 435 Posts