Toyota Sienna Forum - siennachat.com banner

Journeys Offroad 4th Gen Sienna Lift Kit - master picture, resource, and discussion thread

1 reading
65K views 152 replies 37 participants last post by  ttangerine  
#1 · (Edited)
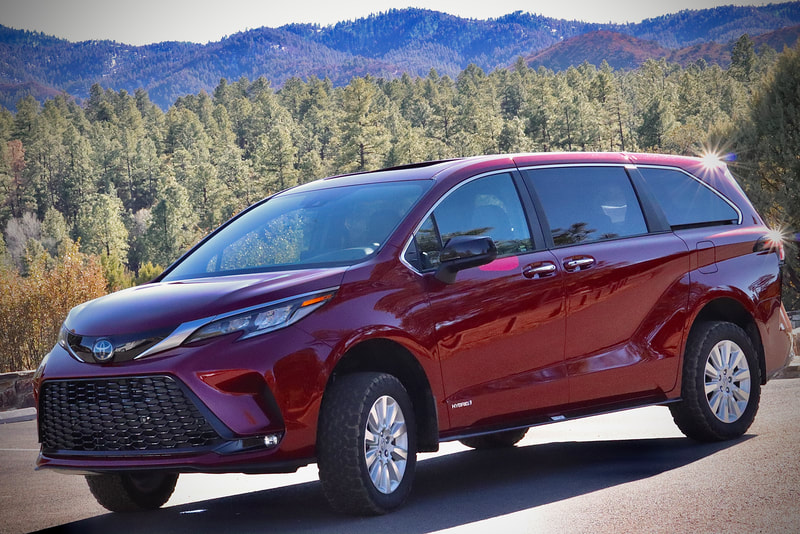
I’ve been considering either the Journeys Offroad (JOR) 2” or 3” lift for my 4th Gen Sienna.

Product webpage:
Image


There are a handful of threads in the 4th Gen forum regarding this lift - I’d like to start an all encompassing thread that not only lists all of these existing resources, but also captures in a single place as many photos and as much info as possible regarding the lift - specifically before/after install photos, installation pricing/info, and general user feedback. I think a thread like this would be very helpful for Sienna owners like myself who are considering installing this lift and are trying to make a well-informed decision.

—-

4th Gen JOR lift owners - if you could follow the below general format (my example responses in italics) in your initial post to this thread, I’d appreciate it. This will allow you to showcase your modified Sienna and should preemptively answer a lot of questions from prospective JOR customers.

Example:
  • Trim level: Limited AWD
  • Model year: 2022
  • 2” or 3” Lift: 3”
  • Wheel/Tire model and size installed: OEM Wheels P235/60R18; no wheel spacers
  • Shop that conducted the install w/ location (if applicable): Joe’s 4x4 Shop - Denver, CO (ask for John); Joe’s is a JOR recommended installer
  • Install labor/materials cost (if you mind sharing): $1,700 out the door
  • Before lift install photos: (if you have them) *Photos inserted here
  • Post lift install photos: (a few different angles would be helpful) *Photos inserted here
  • User feedback / thoughts: Lost approximately 2 MPG per tank; glad I went with the 3” over the 2” - the added ground clearance is very useful; van body rolls a bit more in turns, but manageable

—-

Existing JOR thread list

Below is a list of existing threads that discuss the 4th Gen JOR Lift Kit. If I missed a thread, or if another one pops up, please let me know and I’ll add it:
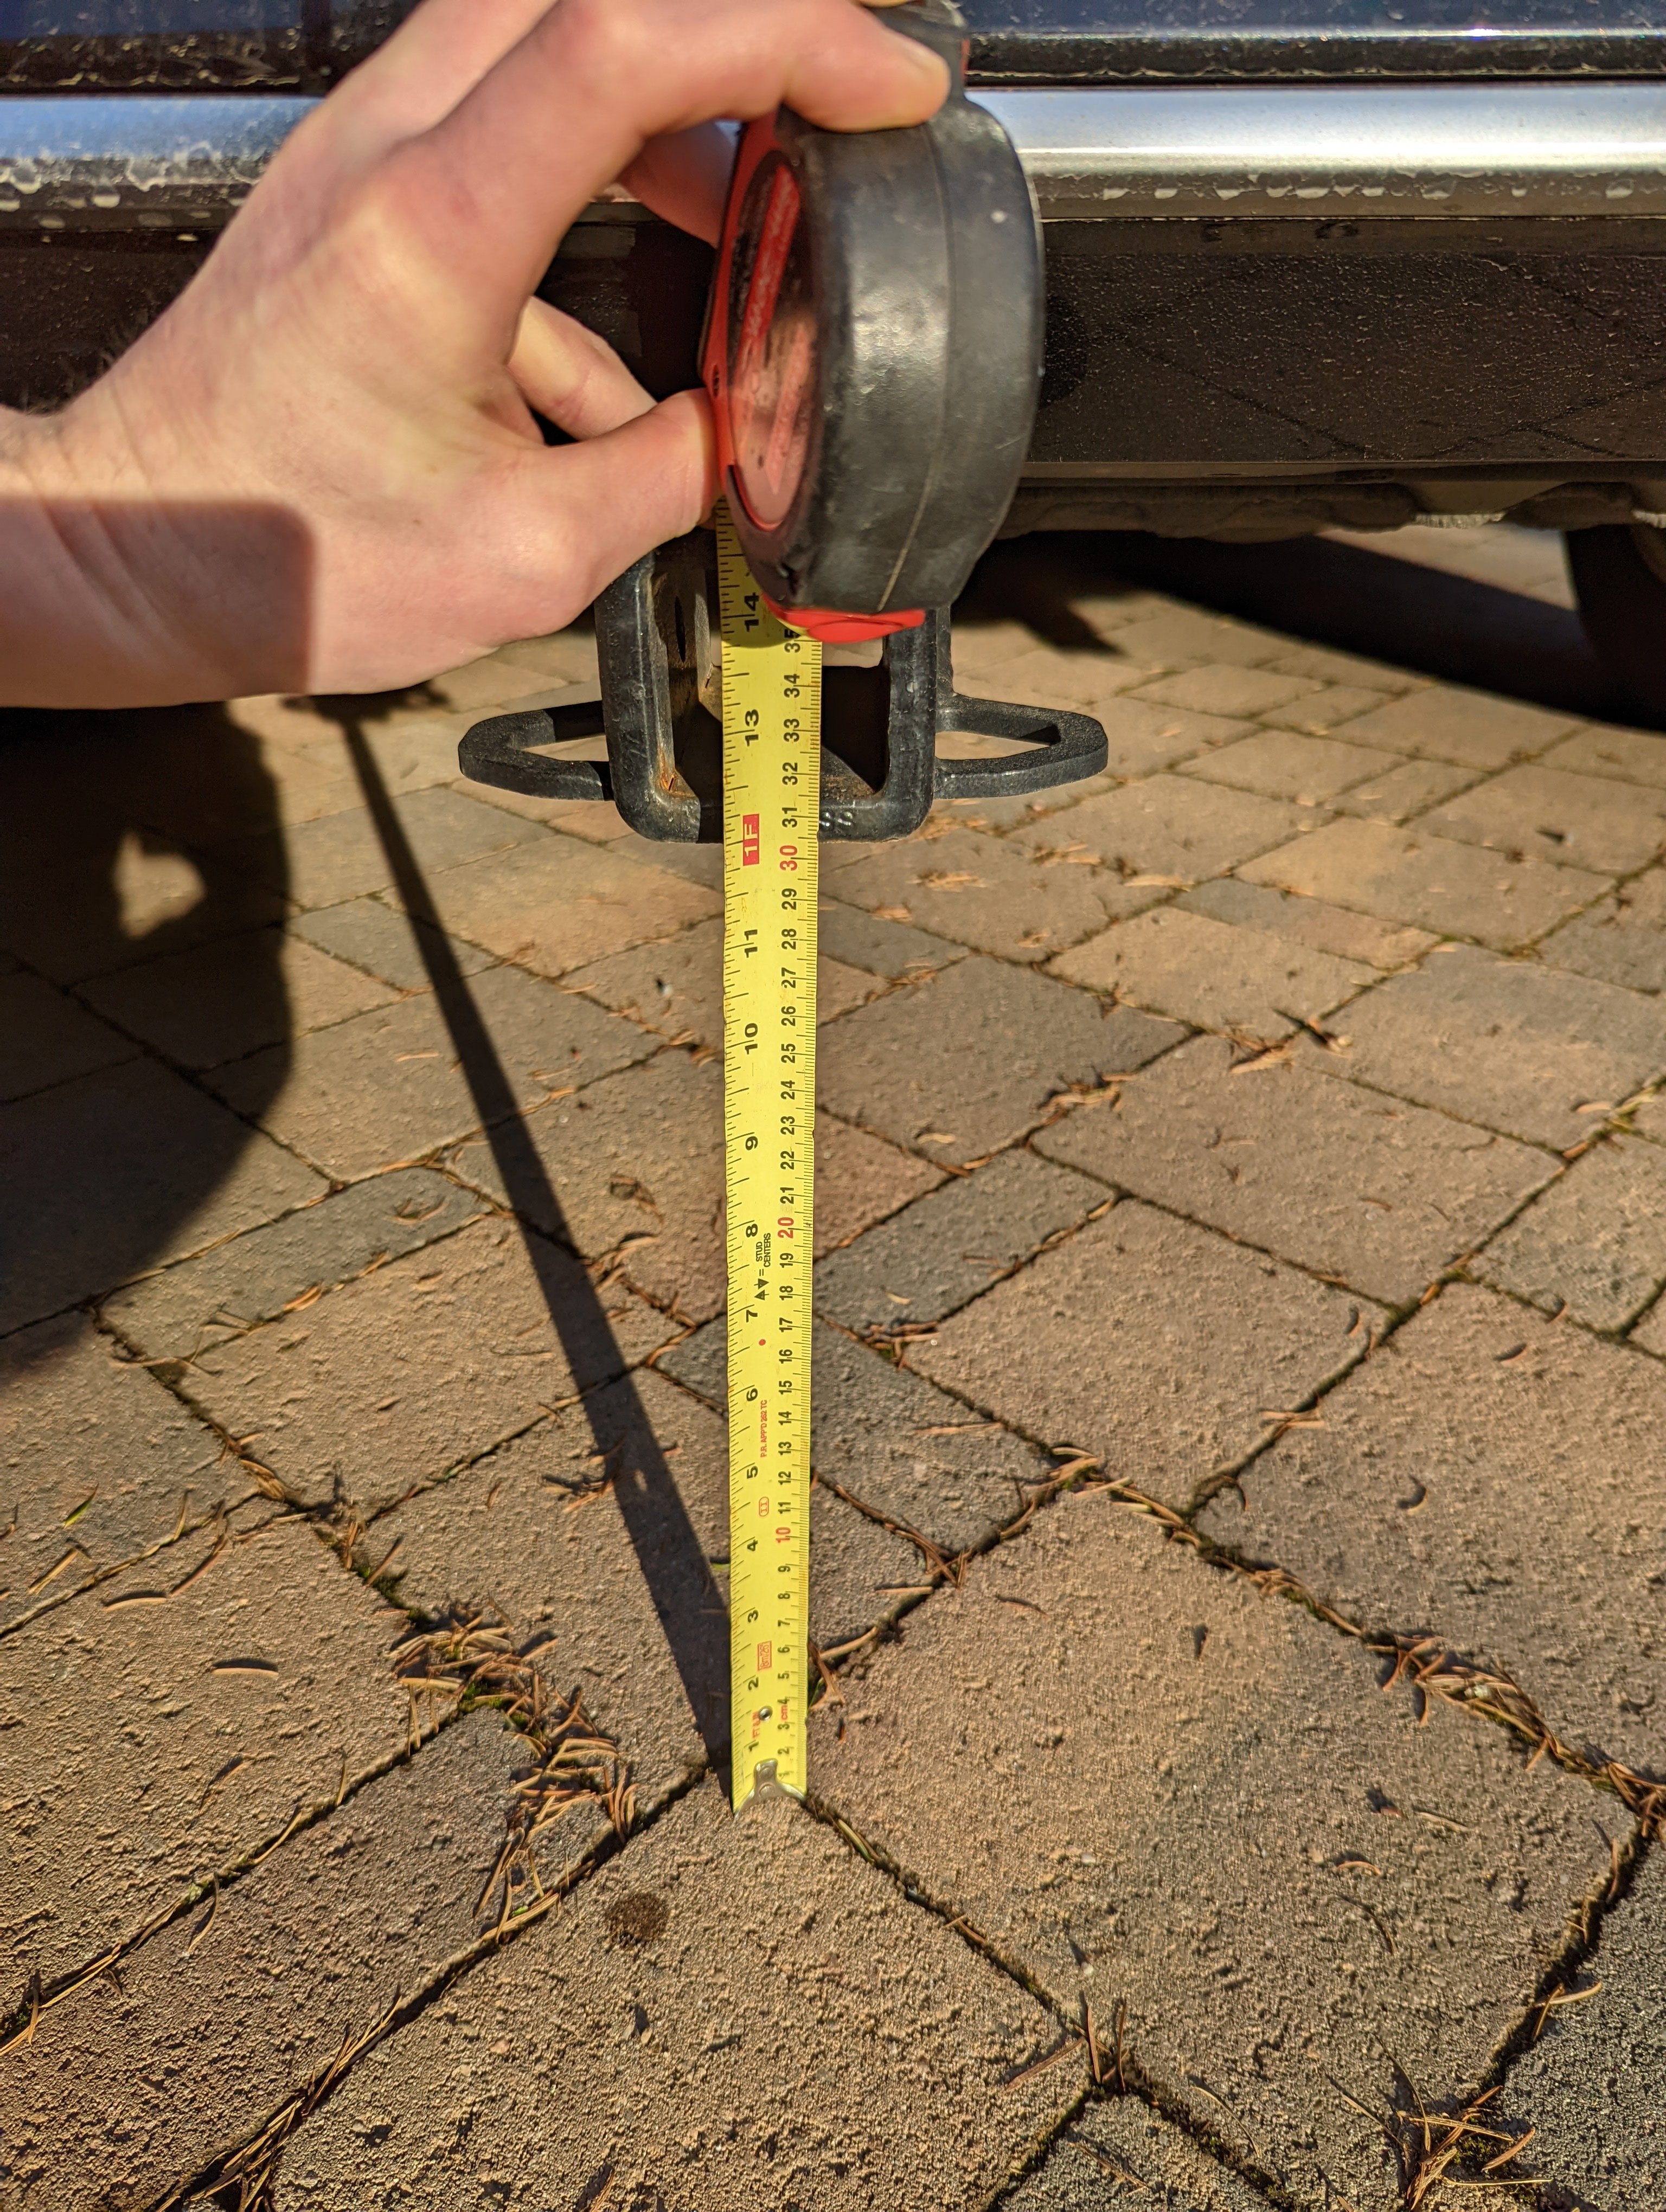


—-

Thank you in advance to the community for your help and support. If anyone has a suggestion to improve this thread, please let me know. I welcome the feedback.

-Steve
 
Discussion starter · #3 ·
This was relevant

and this one has photos of my 2” lift with stock tires.
Added to the thread. Thank you!
 
Discussion starter · #5 ·
I'm having my lift installed by Kendall Toyota of Bend in July. I'll post before and after photos and relevant pricing information here when done!
You’re lucky to live near Kendall Toyota. I’ve checked out their JOR Lift YouTube videos. Looks like they have the process ironed out.


Discussion starter · #7 · (Edited)
Following. Thanks for creating this thread. Perhaps one of the mods could pin it to the top?

For those that installed the lift, what is the max HEIGHT tire that would fit a 2" lift with room for cables (not chains)?
Thank you. Hopefully we can get it pinned.

For the tire clearance inquiry, I’d call Journeys direct to verify:
 
Discussion starter · #9 ·
I don’t live near them! I’m going on a road trip. 😂

If you buy the lift through Kendall and they install it, they offer a dealer warranty. Since I’m losing the Toyota warranty by lifting, the Kendall warranty gives some peace of mind.

Worth the trip IMHO.
I may have to look into this. I’m not that far from them, relatively speaking. And Bend is a cool town.
 
Discussion starter · #11 ·
I don’t live near them! I’m going on a road trip. 😂

If you buy the lift through Kendall and they install it, they offer a dealer warranty. Since I’m losing the Toyota warranty by lifting, the Kendall warranty gives some peace of mind.

Worth the trip IMHO.
Curious to hear about their warranty and if it’s supported through other Toyota service departments within the Toyota network.

Part of me wants to wait until my 35k warranty expires — as the OE suspension would be covered under that warranty — and then install the JOR kit. But if Kendall offers a dealer warranty that they’ll honor to out of state customers, that would sweeten the deal.
 
Discussion starter · #15 ·
2022 Sienna Limited AWD Hybrid
Journeys 3” lift
Firestone Airbags
Sumo coil spring bushing mid front spring mount
Nitto Nomad Grappler (XL) 1 size taller tires, no rub & no spacers.
Factory wheels- Removed chrome hubcaps using 2-3’ construction pry bars. Black Aluminum wheels under chrome hubcaps
Eco hitch
Wilco off-road hitch swing out

ALL modifications and upgrades were performed by myself. If you have a little mechanical background and take your time and don’t get frustrated easily, the parts install very straightforward.
Did not notice any difference in mileage drop, due in part to the tires that were installed being an XL rated. The XL stands for extra load, so it is a slight bit stiffer than the sponge factory tires therefore less roll resistance. No body roll with my set up, it drives like a sports car on mountain roads and that’s no joke. I take corners hard at times and forget my shepherds are in the midsection of my van, and when I realize I’m going into the corner, too hot and look back, my shepherds, are up against the door with that what the hell look on their face🤦‍♂️.
Thank you for sharing - very helpful info and user experience. Those are some tired looking pups :)

I know you have a Limited, but this is how the Woodland edition should look and the stance it should have from the factory, IMO.
Image
 
Discussion starter · #16 ·
2022 Sienna Limited AWD Hybrid
Journeys 3” lift
Firestone Airbags
Sumo coil spring bushing mid front spring mount
Nitto Nomad Grappler (XL) 1 size taller tires, no rub & no spacers.
Factory wheels- Removed chrome hubcaps using 2-3’ construction pry bars. Black Aluminum wheels under chrome hubcaps
Eco hitch
Wilco off-road hitch swing out

ALL modifications and upgrades were performed by myself. If you have a little mechanical background and take your time and don’t get frustrated easily, the parts install very straightforward.
Did not notice any difference in mileage drop, due in part to the tires that were installed being an XL rated. The XL stands for extra load, so it is a slight bit stiffer than the sponge factory tires therefore less roll resistance. No body roll with my set up, it drives like a sports car on mountain roads and that’s no joke. I take corners hard at times and forget my shepherds are in the midsection of my van, and when I realize I’m going into the corner, too hot and look back, my shepherds, are up against the door with that what the hell look on their face🤦‍♂️.
@RCP2013 Also, a couple of questions, really one is a request.

1) Can you take some photos of your rear Firestone airbags installed? I'd really like to see some good shots of how you oriented the bags (outlet down or up?) and how you routed the airlines - this is useful for a DIY guy like me. I have the airbags in my garage waiting to be installed. I'm really interested in how you accomplished this with the JOR lift spacers installed. With the lift, this should be easy to see (van is higher off the ground).

I've asked a few guys on the 4th Gen FB Group and keep getting these type responses, "what's a coil spring?" and "I'm not even sure what you're asking for, a mechanic installed everything for me." ...so I gave up :LOL:. Comes with the minivan territory, I suppose.

2) Did you install the Sumo Springs on your front coils?

---

Thanks for the help. I appreciate it.
 
Discussion starter · #20 ·
No problem on sharing the info! Honestly don’t understand why more peeps don’t help others on the upgrade installation info.
A fire stone representative asked me to send him those detailed pictures because they do not make the bags for the all-wheel-drive hybrid as of yet.
The airbags went on, fairly simple, I just had to sit back and think it through. You do not have to remove your Springs.
That black tubing that you see on the top of the airbag, the air line is inside that fuel line, are used it for protection, going through the hole, where it is routed through to prevent any friction rubbing.
The sumo spacers, I drilled holes in them, so I could zip tie them on just like a pair I installed on my Toyota Highlander that came with the holes.
This is great! Exactly what I was looking for and then some. I knew there was a way to mount them with the outlet facing up (i.e. not drilling the bottom of the spring perch) and you've shown it's possible.

I like the fuel line idea. It makes a good sheathing for the airline. I picked up a similar product that is made for sheathing wiring harnesses in racing engine bays - it's abrasion and heat resistant. I've read on some of the offroad forums that if you can protect the line from heat (which you did with the routing path alone - away from the exhaust) it can last for decades without any cracks or failures. This upward routing is also preferred, IMO, as it reduces the risk of road debris snagging or damaging it.

Here's my ongoing modification thread: Traveler - The Family Hauler/Roadtrip Van

I'll tag your username in my install photos. I appreciate the assist; again, very helpful. 🍻
 
Discussion starter · #28 ·
Anytime on sharing info! My next thing I plan to tackle is remove the rear seat and utilize that compartment. I currently have those pack out Milwaukee boxes mounted to the mounting plates on a piece of plywood that I cut out and wrapped with indoor outdoor carpet.
It serves its purpose currently, and does not shift around and rub on the doors or anything in the back. My plan is to cut that board in half and fabricate a frame out of extruded aluminum and do two separate slide outs one for the refrigerator and one for the pack out boxes which I have two facing out the back door and two facing inward in the van. This would allow me to maximize storage and access space without tweaking my back. I could pull each individual slide out Out so that I can access the third row seating compartment that I will be using for storage as well.
One more question - did you modify the upper spring perch in order to route the air line? It's hard to tell from this photo (below), but it looks like the upper perch was notched to allow enough clearance for the line to exit the perch - maybe I'm wrong? Area of interest is circled in red.

Image
 
Discussion starter · #30 ·
That was actually the easiest part of routine the air line. It’s a plastic cover & there is more than enough room to drill the plastic & not compromise anything structurally.
No kidding… perfect. I assume it’s the mirror situation on the opposite side of the vehicle? I.e. the plastic cover and indentation in the spring perch is present on the driver and passenger side rear of the vehicle?

Sounds like this is a straightforward install. Incredible that Firestone is still stating that their airbag kit isn’t compatible with the 4th Gen AWD models. At this point, it’s proven compatibility in my book.
 
Discussion starter · #33 ·
@admin or @fibber2 - any chance we can get the above airbag-related posts (from pp. 1-2 of this thread) removed from this thread and consolidated into one of the 4th Gen Sienna helper airbag related threads? This is great and very helpful content that would prove to be extremely useful for someone planning/researching an airbag install into a 4th Gen; however, despite its value, this content is a bit off topic for this specific thread discussing JOR 4th Gen Sienna lift kits. Just a thought that I think would help to structure the 4th Gen vehicle modification content on this forum.
 
Discussion starter · #45 ·
I am also interested in the 3" lift kit.

Just talked with Kendall Toyota, and a tech told me that SOME Siennas develop a slight shimmy in the steering wheel as a result of this lift. He said it is not fixable.

Anybody experienced this ?

Any info / thoughts appreciated.
On my 2022 limited all wheel drive hybrid, I had to replace the linkage a due to knocking profusely. The knocking started after putting about 7000 miles on the van post lift. It would get so loud. It sounded like the suspension was going to come apart while driving.

When I contacted journeys off road, which took several calls, because they did not reply to my message, they claimed they were unaware of any issues?
I ordered my replacement linkage directly from Moog and I no longer have the knocking that I had with the originals that came with the kit.
There was a good thread on the JOR lift for the 4th Gen on one of the FB 4th Gen Sienna groups (I think), or it may have been on the lifted Sienna FB Group - can’t remember.

Anyway, one of the guys in that thread is a SAE certified mechanic and a 4th Gen owner. He installed a 3” on his van and said the driveline components (I assume the CV shafts) were at a pretty extreme angle. I messaged him about it and he informed me he swapped out the 3” for the 2” kit as it seemed like a better long term compromise between lift height and longevity of driveline components. Something to consider.

I think that if I go the JOR route, I’ll probably do the same - 2” lift and stick with the OEM tire size, albeit with a slightly more durable/higher performance tire. I think a 2” + airbags in the rear will be a good fit for our family’s use case. Though the 3” lift with a slightly upsized tire looks excellent.
 
Discussion starter · #57 ·
No problem on sharing the info! Honestly don’t understand why more peeps don’t help others on the upgrade installation info.
A fire stone representative asked me to send him those detailed pictures because they do not make the bags for the all-wheel-drive hybrid as of yet.
The airbags went on, fairly simple, I just had to sit back and think it through. You do not have to remove your Springs.
That black tubing that you see on the top of the airbag, the air line is inside that fuel line, are used it for protection, going through the hole, where it is routed through to prevent any friction rubbing.
The sumo spacers, I drilled holes in them, so I could zip tie them on just like a pair I installed on my Toyota Highlander that came with the holes.
@RCP2013 is there a specific part number for the Sumo Springs you installed? Assuming they have different sizes, etc.
 
Discussion starter · #63 ·
No worries on asking questions, trust me I ask at times more than once you always want to confirm when you’re going to do an install especially. I bought the front wheel drive sumo bushings and installed them on my 2022 limited all wheel drive in the front. At the time last year, when I was looking for the sumo bushings, they did not make them or have them listed as fitting the all-wheel-drive. They fit fine, but they were unsure because there were changes to the van prior year.
The back I have Fire stone airbags.
To confirm @RCP2013 , this is the Sumo Spring model/part you purchased? These are listed for front spring application and are listed as compatible with the 4th Gen sienna.

 
Discussion starter · #67 ·
Good timing on your message and me checking my messages. I was just getting ready to head back up to see my patients at work.😁.

The spacer really works well on eliminating a bit of body roll on the front end.
I noticed when I put the airbags on and took it for a drive on the freeway in areas, where it feels like a roller coaster. At speed the front end bogged a little more because the rear end had a slight bit of air to keep the springs a little more stable.
After installing the spacer, it pretty much eliminated the heavy rock ‘n’ roll that you get on some freeways. Now it just glad it’s over those portions nicely.
Just placed the order with eTrailer. Thanks again for the info and confirmation regarding the fit. I may bounce some more questions off you when I get the Sumo Springs in hand and prep for the install, though it looks straight forward.

After installing the rear airbags I understand completely your sentiment about the squishiness of the front end. Once the rear suspension is firmed up by the airbags, it quickly became apparent to me that the front springs needed to be addressed as well. Looking forward to the install and ride improvement.

I’ll take some photos and will try to publish a quick install write-up as well.
 
Discussion starter · #70 ·
Sounds good I will keep an eye out on your messages.
Sounds good I will keep an eye out on your messages. I had mentioned in the past regarding the sumo bushing, the one for the sienna did not have pre-drilled holes to secure it with zip ties.

The sumo bushings I bought for my 2008 Toyota Highlander had pre-drilled holes on the upper end to secure with 4 zip ties.

I pre-drilled the bushings for my sienna, because I like having added security.
I’m in a bad area in the hospital it’s not allowing me to attach the picture again.
I like that idea. I’ll try to duplicate it with my install.
 
Discussion starter · #77 ·
Installing the bags during the lift install makes sense. Will probably add an hour or so to your bill.

I chose the Firestone bags as I like the countersunk/recessed push-fit air fitting that is vulcanized into the top of the bag. The Airlift bags have a nipple that protrudes out of the top of the bag and their supplied air line slides over it. Seems vulnerable, IMO, but that’s just me. I like push-fittings. If you seat the airline well into the fitting, you’ll have no issues. Push-fittings are very popular in the pneumatic industry for this reason.