Toyota Sienna Forum - siennachat.com banner

Traveller ('23 Platinum AWD) - Family Hauler/Roadtrip Build

2 reading
170K views 434 replies 45 participants last post by  yonah  
#1 · (Edited)
Current photos of our Sienna :cool::
Image
Image

Image

Image

Image
Image
Image


---

Jump to modification list:

---

Greetings,

Starting up a modification thread to track and share my tinkering, thoughts, and family adventures with our new kid hauler, road trip vehicle - a 2023 Sienna AWD Platinum.

Background. I’m a big Toyota fan and have owned several Toyota 4x4s over the years; most notably a heavily modified Tacoma and a couple Land Cruisers.

Photos from some adventures with the Tacoma:
Image
Image


The 4x4s were all superb, capable vehicles, but with a growing family and shifted priorities we required an AWD vehicle that is convenient/practical for day-to-day activities with kids. Outstanding fuel economy and range, for long stretches of pavement, would also be a welcome change.

Given this, the new Sienna was the natural choice.

Finding one in this market was a challenge to say the least, but we were able to secure an allocated unit this past December and took delivery in January.

Fresh off the transporter:
Image


A one way flight to Tennessee, followed by a couple days driving, and it was in the garage.

—-

My plan with the modifications to this van is to keep the vehicle’s aesthetics and operability/reliability/drivability as OEM as possible, while adding to the functionality and convenience of the vehicle. Again, this Sienna will be our daily driver/kid mover, so subtle, functional upgrades are the endstate - this isn’t going to resemble a SEMA or tradeshow vehicle, but rather my swing at improving upon an already incredible platform and making it the ultimate vehicle for the “Great American Roadtrip“. I look forward to exploring this country with my family and using this van to do it.

I hope this thread helps and maybe even inspires other Sienna owners to expand the capability of their vehicles; I look forward to gaining knowledge from others here on the forum and sharing my progress along the way.

Thanks for stopping by. Cheers,
 
#2 · (Edited)
OEM vehicle specs:
2023 Toyota Sienna AWD
Platinum trim
Windchill Pearl paint


Factory-installed options:
1500W Inverter
Entertainment Package
Digital Rearview Mirror w/ Homelink


Port-installed (dealer) options:
Floor mats / Cargo liner *replaced with 3W front/rear floor mats
Roof Rack Crossbars *replaced with Whispbar S-45W (Yakima Railbar) crossbars
Body Side Molding
Paint Protection Film / Rear Bumper Appliqué
Mudguards
Illuminated Door Sills
1.25" Class II OEM Tow Hitch *replaced with a 2" Class III Torklift EcoHitch
Integrated Dash Camera
Wheel Locks
 
#201 ·
OEM vehicle specs:
2023 Toyota Sienna AWD
Platinum trim
Windchill Pearl paint

Factory-installed options:
1500W Inverter
Entertainment Package
Digital Rearview Mirror w/ Homelink

Port-installed options:
Floor mats / Cargo liner *replaced with 3W front/rear floor mats
Roof Rack Crossbars *replaced with Autekcomma (Amazon clamping cross bars)
Body Side Molding
Paint Protection Film / Rear Bumper Appliqué
Mudguards
Illuminated Door Sills
Tow Hitch *replaced with a Torklift EcoHitch
Integrated Dash Camera
Wheel Locks
I am also interested in the integrated dash cam. Have you installed yet?
Thx
 
#3 · (Edited)
Modification List:

—-

Interior:
- Adjustable Seat Jackers (by Desert Does It)

- Amazon / AliExpress upgrades

- Anti-drop Armrest Pad

- ARB Classic Series II Fridge/Freezer (Parts #1 and #2 links below):
- ARB 12v Fridge/Freezer Lid "Holder Opener"

- Armrest (by Primo Workz)

- Linear Logic ScanGauge II

- Modern Spare 145/85R18 Oversized Spare Wheel and Tire

- OEM Rear Tri-fold Cargo Mat

- OEM Spare Tire Bracket (Carrier), Interior Trim, and Scissor Jack

- Red Aluminum Rear Hatch Switch Overlay

- Shark WANDVAC Handheld Vacuum

- Toyota RAV4 (2019-2024) Hydroflask/Tumbler Cupholder (by Kaspen Metalworks)

- Under-seat Panel Mount (for secondary ARB air chuck/coupler and Schrader valve airbag fill ports)

---

Exterior:
- 1Up USA Heavy Duty Double Bike Rack

- 3M Scotchlite 580 Reflective Safety Tape Application

- 4-pin Trailer Light Wire Harness Extension and Bumper Mount

- ARB On-Board Air (OBA) Coupler

- Hood Deflector - OEM Toyota Canada

- Let's Go Aero - Silent (Locking) Anti-Rattle Hitch Pin

- NoLoss Valve Stem Caps

- Packasport Voyager (White) (System 90 XP) - Rooftop Cargo Carrier restoration and install (Parts #1-#3 links below):
- Packasport Voyager (Black) (System 90 XP) - Rooftop Cargo Carrier

- Packasport Voyager (System 90 XP) - Rooftop Cargo Carrier garage storage rack

- StowAway 2 Max Hitch Cargo Box - Black

- Torklift EcoHitch

- Toyota Receiver Hitch Cover/Plug

- WeatherTech Bumpstep XL

- WeatherTech Side Window Deflectors

- Whispbar S-45W Crossbars

---

Electrical:
- ARB CKMA12 high-performance 12v compressor / ARB Linx Vehicle Accessory Interface (Parts #1-#4 links below):
- BLP-1 (Brake Light Pulse) Third Brake Light Module

- Front Passenger RAM / MagSafe Phone Mount and Charger

- Mobile Phone and BadElf GPS Receiver Hardwired Charger/Mount (Parts #1-#4 links below):
- OEM LED Trunk/Cargo Light Upgrade

- Rear Hatch / Cargo LED Lights --- now replaced with National Luna lights, see below link:

-
Rear Hatch / Cargo LED Lights - Round Two - Upgrade to National Luna LED Touch Lights

- Rear Power Distribution System (Parts #1 and #2 links below):
- WeBoost Drive Reach Cellular Signal Booster install (Parts #1 and #2 links below):
—-

Mechanical:
- Firestone Coil-Rite 4155 Airbags

- Michelin Defender 2 Tires (235 /60 R18 XL)

- Sumo Springs (front coil spring application)

—-

*** I edit a lot of the posts within this thread. This is mainly done after the fact, as I like to insert links to other thread posts to help tie the modifications together in an organized fashion or add additional photos that I may have missed. I think it makes for an easier read and keeps things organized.
 
#4 ·
The mid seats are supposedly not removable , however there are youtube vids showing folks removing them and inserting a resistor into the airbag connector to trick the computer that the system is intact. Consider also warranty implications for any mods of this nature. Since I travel alone most times were I to use this van in a camping mode I believe there is adequate space behind the tilted and stowed second row seats to accomodate a custom made bed of 6 feet or so. That would be adequate for me. Are you considering lifting this van?
 
  • Like
Reactions: yonah
#6 ·
Thank you for the tip, @paul r, but I no desire to remove the seats. Actually, the captains chairs were a big deciding factor in selecting the Sienna. With kids and all the associated gear they require, we need them. I did see a YouTube video where a guy detailed the removal process. Looked pretty straightforward.

Yes, I am considering the 2” Journey spacer lift. Seems like the best option on the market. All I really want is for the van to sit at what I consider normal SUV ride height - for convenience when entering/exiting the car and parking. There is a certified Journey’s installer near my in-laws home, so that should make things easier.

Airbags are definitely on the list. I really want to get a little travel trailer with a rooftop tent, fridge, and additional storage; something under 1k lbs wet. I have a cool plan for the airbags, but I’m still in the planning/mock-up stage. In theory, it should work.

Following!

We have a similar background. I started with a Tacoma overland build, graduated to a Ram 1500 full-size overland build, and am now waiting (not so) patiently for a Sienna allocation. Needs have changed and the convenience/practicality/MPGs won me over.

Looking forward to seeing what you do with the van.
Similar trajectory, very cool. Thanks!
 
#5 ·
Following!

We have a similar background. I started with a Tacoma overland build, graduated to a Ram 1500 full-size overland build, and am now waiting (not so) patiently for a Sienna allocation. Needs have changed and the convenience/practicality/MPGs won me over.

Looking forward to seeing what you do with the van.
 
#7 · (Edited)
Amazon / AliExpress upgrades:

First additions were the standard Amazon / AliExpress upgrades that we’re all familiar with via the 4th Gen Facebook group and this forum. I consider all of these easy upgrades that either make the car more organized, protected against wear and tear, or in the case of the door reflectors, more safe. As these mods are so common, I’m only adding photos of specific things I want to highlight. In no particular order:

—-


Passenger Seat Wireless Remote

This is by far my favorite AliExpress mod. Being able to control the passenger seat from the drivers seat is actually very convenient. I often let my kids out of their car seats while we’re parked and my wife is inside a store running errands. It’s nice being able to move the seat up to give them more space to play and stretch out on the floor

The kit came with no instructions, but it was easy enough to figure out - the harness jumps three of the factory under-seat wiring harnesses. It’s a plug-and-play harness, with no splicing or irreversible modification required to the factory harness.

I secured the wireless control unit on the center dash tray to the left of the USB data port. Convenient and out of the way. I think this is probably the best, most ergonomic location for it:
Image


—-

Ecarzo Storage trays: (more on some modifications to the dash unit storage tray later…)

Ecarzo Center Console Dash... Amazon.com

Ecarzo Center Console Organizer for 2021 2022 Amazon.com

Ecarzo Center Console Bottom... Amazon.com

—-

CarPlay wireless dongle:
Teeran CarPlay Wireless Adapter

Secured the dongle on the underside of the dash trim via 3M molding tape (as seen in the above photo with the Passenger Seat Wireless Control).

This unit seemed to have the best reviews on Amazon and on the 4th Gen Sienna Facebook group. It has worked near flawlessly for me. Only hiccup I’ve experienced is Waze maps will freeze occasionally (about once every two weeks). I have to unplug and plug back in the dongle to reset it, then all is good. Otherwise, it connects quickly with no other issues.

—-

3W Floor Liners:

—-

Emz Leather Center Console Armrest Cushion Pad (Black):

Overpriced for what it is, but this little cushion is not only comfortable, but it keeps loose items from being placed on the console flip lid where they can slip into the black hole inside the console. I found through reading reviews that the brown material wasn’t a good match for the Platinum noble brown leather seats, so I went with black. It matches the interior very well:
Image


—-

Drop Stop Car Seat Gap Fillers:

Overpriced as well, but well worth saving my knuckles from reaching under the seat to retrieve my wife’s keys or cell phone… I have two sets of these and keep them in our daily driven vehicles.

—-

Aujen Silicone License Plate Sleeve/Gasket:

—-

Rear HVAC Vent Debris Covers:

—-

Door reflectors:
 
#32 ·
The kit came with no instructions, but it was easy enough to figure out - the harness jumps three of the factory under-seat wiring harnesses. It’s a plug-and-play harness, with no splicing or irreversible modification required to the factory harness.
The wire harness has one 2-wire connector. Under the seat, there’s 2 2-wire connectors, which one do I connect it to?
Image

Image
 
#9 · (Edited)
Torklift EcoHitch install:

Completed the EcoHitch install this past Friday night.
Image

Image


I didn’t take a lot of photos during the install as this video…


…and the supplied instructions are all anyone should need; there’s not much for me to add beyond a few tips:

1) You’ll definitely want a pair of tin snips (as seen in the aforementioned video) to notch the wiring harness bracket on the left rear corner of the vehicle body. A 3/4”-1” wide file is also helpful to deburr this bracket after cutting; followed by some touch-up paint. I went a step further and ran a ~1” long piece of edge trim to line the cut portion of this bracket to prevent any abrasion to the rerouted wiring harness — this is the same edge trim I used to dress up the cut-out in the bumper for the hitch tube (see below photos of the finished install).

2) I put hand tool removable threadlocker on all of the hardware and marked each with a yellow tick from oil-based paint pen for visual inspection in the future. This is a great tip I picked up from my late grandfather (he was a professional mechanic all of his adult life); it’s an easy way to visually inspect the hardware for any loosening from vibration, etc. Though I think this would be unlikely after the threadlocker application.
Image

Image


3) Highly recommend purchasing or renting a calibrated torque wrench to properly tighten the hardware. It’s easy to over-torque (and ruin) the split-ring lock washers supplied with this hitch. I always have peace-of-mind when I’ve properly torqued hardware, especially hardware securing a load bearing piece of kit like this hitch.

Two friends held the bumper skin in place to help me align and mark it for the hitch tube cutout. I used painters tape to mark the areas to cut; the tin snips and a file were all I needed to cut the bumper skin - it’s a little too thick to be cut with a razor blade. The directions in this thread, (Torklift Ecohitch finished product) by @amandahugginkiss4 helped me get the initial cut-out in the correct location - great tip, among many more in this thread created by @PetTaxi. I did flare out the rectangular cut at the base of the bumper to clearance the back of the hitch tube - the final cut resembled a bell shape; the photo below is my first swing at the cut-out. I marked in red the two areas to notch to create the bell shape.
Image


It took us a few mock-ups, but the finished product turned out great. Very clean. The edge trim added an OEM-like touch. If anyone is interested, here’s an Amazon product link to the trim I used — Edge Trim Black Small, Fits Edge 1/16 to 1/8 Inch, Length 10 Feet (3.05 Meter) https://www.amazon.com/dp/B00M8MAOLI?ref_=cm_sw_r_apin_dp_BWMH2C3X8VCC8TB443PT. It’s reinforced with aluminum strips and very strong. Once it’s installed, it’s not going anywhere.

My rear dust cover was already professionally notched/clearanced from the OEM hitch install, so that was a nice surprise that saved me a little time.

Final install photos:
Image

Image

Image

Image


All-in-all, I’m very happy with the EcoHitch. It’s a phenomenal, well-made product and beefy - it’s great to have a 2” receiver on the back of the van; as I have a HD 1Up USA bike rack that fits a 2” tube and would like to get a small, ~1k lb travel trailer in the future.

The only bummer I have with this install is the van itself. Our Sienna had the port-installed rear hitch which deleted the rear kick sensor and associated wire harness pigtail that would otherwise branch off of the rear bumper parking sensor wire harness. Now that I have the kick sensor compatible EcoHitch, I’m determined to retro fit the rear kick sensor, if I can. More to follow on that front.

—-

EDIT: trailer wiring harness extension and plug mounting bracket install, info, and photos can be found here:

4-pin Trailer Light Wire Harness Extension and Bumper Mount

EDIT: A genuine Toyota receiver hitch cover/plug really finished the look of the EcoHitch, photos and info here:

Toyota Receiver Hitch Cover/Plug
 
#10 · (Edited)
ARB Classic Series II Fridge/Freezer install (Part #1):

For those that may be interested, an ARB 50-quart Classic Series II 12v Fridge Freezer (and by extension their 37-quart model, as well) fits perfectly on top of the 1/3 (right-side) third row seat when folded down.

ARB Classic Series II product spec sheet:

The fridge’s rear tie-down straps align with the front anchors on the third row seats. The left-side front fridge tie-down strap aligns with the van’s right rear tie-down anchor. I ran the right-side front tie-down strap to this anchor as well, but the awkward angle forced me to re-route the strap outside of it’s designed channel (no big deal); however, I think with a little fabrication on my end, I may be able to remedy this and properly align the strap. With all the straps snugged tight, the fridge is locked down and rock soli, no play or side to side wiggling.

For now, I am powering the fridge with the van’s OEM inverter. This is inefficient and not the preferred method, but my plan is to hardwire it to the 12v starter battery within the coming weeks.

One cool feature of the new ARB Classic line of fridges is they are Bluetooth compatible with an interactive app that can be downloaded via the Apple or GooglePlay Store. The app allows the user to control the temperature setting and displays any warning messages (lid ajar, for example) for up to three separate fridges, IIRC.

Photos:
Image
Image
Image
Image
Image
Image


Continued here in Part #2
 
#11 · (Edited)
Mobile phone and BadElf GPS receiver hardwired charger/mount (Part #1):

I’ve found the OEM wireless charger is not really practical for my needs and it charges intermittently; I also like to view my phone’s screen occasionally while driving, especially when I’m listening to a podcast and a graphic is discussed, etc. I find it less distracting than fumbling for a phone that’s lying flat on a charging pad. With that being said, I went about installing a variation of a mounting setup that I’ve placed into three previously owned vehicles.

---

Teaser photo of the final product:
Image


The following posts will detail my install process.

—-


Summary of products used:

-2021+ Sienna ProClip dash mount (Part #855709)
Toyota Sienna Center Dash Mount | ProClip USA

-Ram 1” ball socket swivel mount (aligns perfectly with the pre-drilled AMPs holes in the ProClip mount)
RAM® Single Socket Arm with Round Swivel Plate – RAM Mounts

-Ram 1” ball MagSafe puck holder
RAM® Ball Adapter for Apple MagSafe – RAM Mounts

-Ram composite short length clamping arm
RAM® Composite Double Socket Arm - B Size Short – RAM Mounts

-Ram 1” ball flat mount
*can't find the product link, but the base is approximately 2" x .05" with a 1" (Size B) ball

-Apple MagSafe charger puck
MagSafe Charger - Apple

-1” ball mount (I think this was part I scrounged from a MobArmor phone mount a few years back)
Mob Armor Switch 1" Ball Adapter - Cycle Gear

-CoolGear ChargeIt! Mini 75W Dual Port USB-A / USB-C PD Charger
Chargeit! mini 75W Dual Port USB Charger with PPS - Coolgear

-Mini Fuse Tap “Piggyback” - Add-a-Circuit
Nilight - 50038R 10 Pack 12V Car Add-a-circuit Fuse TAP Adapter with 5 Amp Low Profile Mini Blade Fuse Set for Cars Trucks Boats (amazon.com)

-16 AWG dual jacketed wire
Pico 8133PT 16 Gauge Jacketed 2 Conductor Primary Wire 25' per Package - Electrical Wires - Amazon.com

-Associated stainless steel machine hardware, nylon lock nuts, rubber grommets, etc.

-Weatherpack connector (2-way)
12015792 | Weather Pack 2 Way Black Female Connector (customconnectorkits.com)
12010973 | Weather Pack 2 Way Black Male Connector (customconnectorkits.com)

-Wire sheathing and heat shrink tubing

-USB-A to Micro USB cable (to power the BadElf)
Best Buy essentials™ 3' USB-to-Mini-B Charge-and-Sync Cable Black BE-PC2AMU3 - Best Buy
 
#199 ·
Mobile phone and BadElf GPS receiver hardwired charger/mount (Part #1):

-2021+ Sienna ProClip dash mount (Part #855709)
Toyota Sienna Center Dash Mount | ProClip USA
According to ProClip's website, this mount does not fit the Platinum trim. We just purchased a Platinum, and I'm curious if you know why this would fit a Limited, but not Platinum.

Thanks,
- Zack
 
#12 · (Edited)
Mobile phone and BadElf GPS receiver hardwired charger/mount (Part #2):

I really like Apple’s wireless MagSafe charging puck and the convenience of a phone mount that I do not have to fumble with when getting in and out of the vehicle. With the MagSafe charging puck acting as a magnetic phone mount, all I need to do is place my phone on the puck and the magnets do the rest - no need to fumble with a dial or clamp.

In order to incorporate the MagSafe into a mount I used Ram Mount’s MagSafe puck holder with a 1” ball attachment. The puck pops into this holder and the tight tolerance keeps it snugly in place.

The BadElf is a Bluetooth-enabled GPS receiver that can display your current altitude, grid coordinate, speed, heading, etc. in real-time; however, the feature I most enjoy is the receiver’s Bluetooth capability allows it to sync with an external device, say an iPad or iPhone, and deliver the grid coordinate and heading to that device. With stand-alone/offline mapping software downloaded (like Gaia GPS, Hema maps, or a digital road atlas) this location can then be depicted on the map independent of any cellular connection. The endstate is very accurate satellite geolocation (~10'). This is great for traveling in areas with poor or non-existent cellular data networks - i.e. the traditional navigation apps like Google Maps or Waze are of little or no use in these scenarios. Additionally, the BadElf can be detached from the vehicle, thrown in a backpack, and deliver the same capability on foot.

More info on the BadElf Pro:
Bad Elf GPS Pro (bad-elf.com)

I used 3M heavy duty molding tape to secure the 1” Ram ball to the back of the BadElf’s case and then attached a short (3”, Size B) composite Ram mounting arm.

Both the MagSafe charger and BadElf were then secured to a 2021+ Sienna-specific ProClip center dash mount. An additional 1” ball was carefully mounted to the top portion of the ProClip mount via a machined Allen head bolt.

I am a big proponent of ProClip's product line and have installed their phone mounts in several Toyotas. The mounts are precision machined out of plastic and due to this composition, will not scratch your dash once installed. Proclip mounts are installed by wedging them in various cracks and crevices in between respective dash panels. I belive the mounts are made in Northern Europe, by Brodit) and disturbuted in the US by ProClip.

ProClip unit and supplied instructions:
Image
Image

Image


Per their instructions for this product, ProClip claims this 4th Gen Sienna-specific mount can be installed via their supplied pry tool without partial dash disassembly; however, I found this not to be the case. I simply could not get the upper hooked part of the mount behind the center dash panel. I removed the radio/head unit and then very slowly slid the ProClip mount onto the center dash panel from right to left.

I recommend watching the first 30 seconds of the below Youtube video to better understand how to remove the infotainment head unit. It is pretty simple: pry off the plastic shroud, remove 4x 10mm bolts, unclip the wire harnesses and slide the entire unit out towards the back of the van. One thing I recommend doing before you unclip the wire harnesses is to take a few photos of them plugged into the head unit. It helps when rerouting everything during reinstall.

EDIT: @Fattypros completed this install and did not unplug the head unit, but instead flipped it up onto the dash. I recommend doing this instead of tediously unplugging all of the unit's connectors. Link to his post: https://www.siennachat.com/posts/486940/

The desired location for the ProClip mount was marked prior to installation with painters tape - this ensured the mount cleared the infotainment screen and edge of the storage tray. Lay down this tape before removing the head unit.
Image


Photos of the mount installed:
Image

Image

Image


Once in place and the dash panels are pressed back into their friction clips, the ProClip mount is solid as a rock.

*Ignore the USB charging cables mounted to the sides of the ProClip mount; I abandoned this method of cable management / power distribution for what you’ll see later on in this post (the CoolGear ChargeIt! Mini…).
 
#409 ·
Mobile phone and BadElf GPS receiver hardwired charger/mount (Part #2):
Good day Yonah,

I followed your example and added the proclip mount today, replacing a mount that would droop over time. Very pleased with it's sturdiness although I have yet to drive with it installed.

I wanted to share a likely useless piece of information as so much time has passed, but after pulling the screen, I found the cables had enough slack to just flip the screen over on top of the dash to get it out of the way.

Image


I also was able to pull the leather wrapped trim up and get the clip to wedge over the bottom and top by carefully pressing on the bottom portion of the clip to force it up and over. Sliding it almost caused the leather to bunch up.

Image


I look forward to sturdiness in the future! As I am just using my USB C for CarPlay the non powered option works for me. Thanks for your motivative and informative posts!

Image
 
#13 · (Edited)
Mobile phone and BadElf GPS receiver hardwired charger/mount (Part #3):

Power distribution... With the mount in place, it was time to tackle the electrical side of this project.

For power distribution, I opted for the ChargeIt! Mini 75W Dual Port USB-A / USB-C PD Charger from CoolGear. This little unit packs enough power to keep the MagSafe charger happy and functioning as intended (dashcam USB hardwire kits will not accomplish this as they do not supply enough amps). Popular with Vanlife/RV installs, the ChargeIt! is packaged in a clean, durable metal housing with multiple mounting holes to ensure a secure, clean installation.

More info on the CoolGear ChargeIt! Mini:
ChargeIT! Mini 140W USB Type-C PD Charger w/ EPR Support - Coolgear

I decided to mount the ChargeIt! unit out of the way (and view of the driver/passenger) in the Ecarzo Center Dash (radio top) Storage Tray. In this location, the unit is out of sight, but still easily accessible. Mounting holes for the ChargeIt! we’re drilled along with three 3/4 holes for cable pass-thru grommets. This part of the project took awhile as it took some time to choose an orientation for the ChargeIt! that I liked and did not interfere with cable routing. The other benefit of mounting the unit in the Ecarzo tray is it is an aftermarket product and not an OEM panel or piece of the dash. I really try to avoid permanently modifying the OEM parts of the vehicle where I can.

The cable pass-thru grommets were popped into place and the ChargeIt was secured to the tray with long stainless machine screws with nylon locking nuts. The ChargeIt! was elevated about 1/2” off the tray with some black nylon spacers to reduce any connector binding at the USB-A/C ports against the tray material (this makes it easy to plug/unplug the charging cables). Additionally, this elevated position also keeps the unit cool.

Image
Image

Image
Image
Image
Image
Image
Image
Image
Image


For wiring, I built a 16 AWG harness with a quick disconnect (Weatherpack) connector at the ChargeIt! side of the harness. A micro blade fuse piggyback was used to safely (and reversibly) access the 15A power outlet circuit. All connections were soldered and wrapped in moisture-proof heat shrink; the entire harness was then protected via mesh, abrasion resistant wiring loom.

I used a wooden dowel to aid in fishing the harness down to the driver side kick panel area where it was secured with zip ties in an OEM fashion and grounded to a threaded stud behind the kick panel, near the under-dash fuse panel.

Additional photos to follow in the next post as I reached the ten photo limit per post.
 
#15 ·
Mobile phone and BadElf GPS receiver hardwired charger/mount (Part #4):

The OEM plastic trim piece on top of the radio was stored and not reinstalled to allow proper routing of the wiring harness. I also didn’t want to drill an access hole in this piece for the wiring harness; this keeps the modification reversible, though I doubt I will ever change it.
Image
Image


With the Weatherpack connector assembled/connected and the storage tray installed, it was then time to route the MagSafe and mini USB cabling. A wiring management clip and some velcro cable wrap cleaned things up nicely. The finished product - clean, convenient, and organized:
Image
Image
Image
Image
Image


The cool thing about this mount and power solution is that is modular (if I do not want the BadElf installed, I can remove it without tools) and cables can be swapped out if I decide to install a different type of phone mount or charger.
 
#16 · (Edited)
OEM Rear Tri-fold Cargo Mat:

I also installed the rear OEM cargo mat and completed the rear spare tire conversion.

EDIT: spare tire conversion kit documented here in a separate post: Traveler - The Family Hauler/Roadtrip Van

The rear tri-fold cargo mat is very well-made with good coverage. Glad to have it for the occasional furniture/bulky item move. The back of the mat has a few male velcro (hook) sections to keep it in place on the carpeted back of the third row stowed seats.
Image
 
#17 · (Edited)
ARB CKMA12 high-performance 12v compressor / Linx Vehicle Accessory Interface install (Part #1):

In the near future, I’m going to install an onboard air (OBA) system in the van for tire inflation (auto and bicycle), suspension helper airbag inflation, and general compressed air tasks — ex: blowing sand and debris off of beach/hiking gear before stowing it in the van.

The heart of this system will be the proven, durable ARB CKMA12 compact high-performance compressor. This unit has been on the market for over a decade and should provide many years of reliable service.


Stock photo of the unit:
Image


I’ve been pulling interior panels and scouting a location for it. The real challenge with modifying the Sienna to be an quasi-touring/overlanding vehicle is no bolt-in kits exist for such a modification. For example, if I were planning this install in a Jeep Wrangler or Toyota Land Cruiser, there would be at least 3-4 pre-fabricated brackets on the market for a relatively plug-n-play install.

After much thought, I think the best spot for the compressor will be to mount it inside the OEM cast aluminum spare tire bracket. It will be out of the way, yet easily accessible. This bracket is thick, beefy and will no doubt support the ~10 lb heavy compressor; just as important, the compressor appears to shoehorn inside the bracket with room to spare for air regulating solenoids and a 12v power relay. The compressor has provisions to rotate its body and attached manifold in a myriad or orientations; thus allowing the unit to really tuck into the bracket.

There will be some light fabrication work involved, but I think in the end it will be a pretty straight forward project. Some mock-up photos below — more follow in the future. I’m excited to tackle this project. It’s going to be a very practical addition to the vehicle and will be an almost entirely hidden modification.
Image
Image


Continued here in Part #2
 
#18 · (Edited)
OEM spare tire bracket (carrier), interior trim, and scissor jack install:

I actually knocked out this upgrade back in late January about a week after getting the van and am now getting around to posting about it. I wanted AWD, rear entertainment/inverter/ottomans, and spare tire all installed in our van. But when considering these options, one can only get 2-of-3. I opted to delete the spare tire as it seems like the only add-on that could be done at a reasonable cost, or at all, post-purchase of the vehicle.

A Toyota Dealer, about 90 minutes away, had this full kit in stock with the correct rear left interior trim piece and wheel cover. When I chatted with the parts rep at pick-up, he said these kits were selling as fast as he could get them in. We dismantled the box before loading everything in the van. The original box was massive.

—-

Parts breakout:

Spare tire carrier kit - 51900-08080-C2 (one each)
(“C2” denotes Platinum trim with sunscreens/rear entertainment (“DVD”) audio jack/controls)

Nut, Cap - 90176-06051 (four each)
These little nuts secure the scissor jack carrier assembly to the right rear cargo area (via preexisting threaded rods in the trunk)

*The above part numbers have everything you need (minus the wheel/tire).

—-

Instructions can be found in this post:


I do not have much to add regarding the install that isn’t covered in this thread: spare tire conversion kit install

—-

I will note that I did use the Torklift EcoHitch install video (linked above in my hitch install post) to discover the easiest way to remove the rear cargo panel and left rear interior trim panel. This helped a lot.

As I mentioned in my last post, the spare tire bracket is cast aluminum, solid as a rock, and mounts to the body of the vehicle in four separate places. I will be using it as the backbone to support an ARB 12v compressor install (along with some other aftermarket goodies).

—-

Photos:

Unboxed, to save some interior space, at delivery. I also ordered the rear cargo mat at the same time which I mentioned in an earlier post here: Traveler - Modifications, Tinkering, and Thoughts

Image


Inventoried:
Image


Installation photos - took me a couple of hours; I work slow and methodically. I tried not to break any interior retention clips.
Image
Image
Image


Added some dummy labels to the spare tire bracket. I’ll need to use the manual fuel door release at some point and will probably forget where it’s at when that happens in five years. Also added the torque spec of the lug nuts to the spare tire bracket.
Image


Finished:
Image

Image


Scissor jack installed. I added some edge trim (same used in my EcoHitch install) to dress/clean-up the modified carpet
Image


Done. Labels added to the jack cover. I find the jack is a bit subdued in the trunk area. This should help my wife or another family member find it in an emergency:
Image


—-

Now I just need to order the actual spare tire and wheel. I’ll probably go with Modern Spare as it’s a convenient option (ships mounted/balanced) and their wheel’s spokes are oriented in a way that is different from the OEM option; this difference will integrate well with what I have planned for the 12v air compressor install.


EDIT: link to the Modern Spare wheel/tire install:
 
#186 ·
OEM spare tire bracket (carrier), interior trim, and scissor jack install:

I actually knocked out this upgrade back in late January about a week after getting the van and am now getting around to posting about it. I wanted AWD, rear entertainment/inverter/ottomans (maybe it’s just the ottomans?), and spare tire all installed on our van. But when considering these options, one can only get 2-of-3. I opted to delete the spare tire as it seems like the only add-on that could be done at a reasonable cost, or at all, post purchase of the vehicle.

A Toyota Dealer, about 90 minutes away, had this full kit in stock with the correct rear left interior trim piece and wheel cover. When I chatted with the parts rep at pick-up, he said these kits were selling as fast as he could get them in. We dismantled the box before loading everything in the van. The original box was massive.

—-

Parts breakout:

Spare tire carrier kit - 51900-08080-C2 (one each)
(“C2” denotes Platinum trim with sunscreens/rear entertainment (“DVD”) audio jack/controls)

Nut, Cap - 90176-06051 (four each)
These little nuts secure the scissor jack carrier assembly to the right rear cargo area (via preexisting threaded rods in the trunk)

*The above part numbers have everything you need (minus the wheel/tire).

—-

Instructions can be found in this post:


I do not have much to add regarding the install that isn’t covered in this thread: spare tire conversion kit install

—-

I will note that I did use the Torklift EcoHitch install video (linked above in my hitch install post) to discover the easiest way to remove the rear cargo panel and left rear interior trim panel. This helped a lot.

As I mentioned in my last post, the spare tire bracket is cast aluminum, solid as a rock, and mounts to the body of the vehicle in four separate places. I will be using it as the backbone to support my ARB 12v compressor install (along with some other aftermarket kit).

—-

Photos:

Unboxed, to save some interior space, at delivery. I also ordered the rear cargo mat at the same time which I mentioned in an earlier post here: Traveler - Modifications, Tinkering, and Thoughts

View attachment 61655

Inventoried:
View attachment 61647

Installation photos - took me a couple of hours; I work slow and methodically. I tried not to break any interior retention clips.
View attachment 61646 View attachment 61648 View attachment 61649

Added some dummy labels to the spare tire bracket. I’ll need to use the manual fuel door release at some point and will probably forget where it’s at when that happens in five years. Also added the torque spec of the lug nuts to the spare tire bracket.
View attachment 61652

Finished:
View attachment 61654
View attachment 61650

Scissor jack installed. I added some edge trim (same used in my EcoHitch install) to dress/clean-up the modified carpet View attachment 61651

Done. Labels added to the jack cover. I find the jack is a bit subdued in the trunk area. This should help my wife or another family member find it in an emergency: View attachment 61653

—-

Now I just need to order the actual spare tire and wheel. I’ll probably go with Modern Spare as it’s a convenient option (ships mounted/balanced) and their wheel’s spokes are oriented in a way that is different from the OEM option; this difference will integrate well with what I have planned for the 12v air compressor install.

EDIT: link to the Modern Spare whee/tire install:
Traveler - The Family Hauler/Roadtrip Van
How would you rate difficulty level? and is 51900-08080-C2 the correct part for all Platinum AWD? my exterior is Silver.
 
#19 · (Edited)
ARB CKMA12 high-performance 12v compressor / Linx Vehicle Accessory Interface install (Part #2):

Made some more headway this evening with the compressor project. Big milestone completed, I actually have the compressor mounted - now I need to run the electrical connections and plumb the system.

This has been a fun undertaking. The ‘shoehorning’ is pretty much done - it involved precision holes drilled in tight spaces, some light clearance work of the spare tire bracket itself, and some fabrication with 1/4” thick sheet aluminum and bar stock to physically mount the compressor and the ARB Linx Vehicle Accessory Interface that will be the nervous system of this OBA project and other modifications within the ARB ecosystem.

The Linx was chosen to not only to finely control the compressor’s output, but also control each suspension helper airbag’s inflation to level the van from front-to-back and also side-to-side. Air bags have yet to be installed, but are a future mod to aid the vehicle’s handling and ride quality while towing. Additionally, the Linx can monitor the 12v battery’s charge status/health, trailer TPMS sensors (for our future camping trailer), 12v fridge/freezer status, and control electrical accessories via six relay trigger outputs.

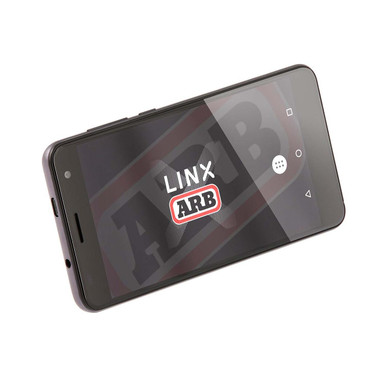
For those unfamiliar, here’s some manufacturer info regarding the Linx and a stock photo:
Image


I relocated the compressor’s air intake filter so it can be serviced easily by simply removing the spare tire cover and not the spare tire, or entire spare tire bracket.

The system is also designed to be completely attached to the bracket with a centralized disconnect for the primary/negative compressor power cables, vehicle 12v accessory wire, Linx USB data cable, and airlines. I did this to make the entire system easily inspectable in the future for trouble shooting or leak investigation - there will eventually be a leak somewhere in the airlines; it’s an inevitability with compressed air systems. Removal will be as simple as unbolting the spare tire bracket and disconnecting the quick-disconnects attached to the aforementioned cables/airlines.

A couple of the mounting bolts are a little too long and need to be swapped out for some shorter variants for a cleaner look, but that’s an easy fix.

Enough text, I’ll let the photos do the talking:
Image
Image
Image


I later replaced these sheet metal screws - that secure the filter assembly to the bracket - with stainless machine bolts / nylon lock washers:
Image
Image
Image
Image
Image
Image


Continued here in Part #3
 
#21 ·
Sure thing. Here’s a copy of my invoice. I ordered through www.shoptoyotaparts.com

—-

Part Number
Part Name
Price
Qty

51900-08080-C2
Spare Carrier
$233.89
1

90176-06051
Nut Cap
$0.98
4

—-

The “C2” designation at the end of the Spare Carrier part number denotes the color scheme, sunshade, and rear “DVD” controls in the Platinum trim. It seems each trim has a different alphanumeric code behind this part number.

The jack, jack carrier, and jack cover are all included in the Spare Carrier part number. When you purchase that part, you get the interior trim panel, spare tire cover, cast aluminum spare tire bracket, and jack items - it’s all inclusive.

The “Nut, Caps” must be ordered separately to secure the jack holder to the body of the van (in the trunk area). For some reason you have to order these separately. You’ll need a quantity of four.

The instructions were not included with my purchase, but I was able to locate them online and print for the install. Only tricky part is cutting the carpet. Follow the instructions and you’ll be fine.

This thread is very helpful:
 
#23 · (Edited)
Rear power distribution system install (Part #1):

I’ve posted a couple of upgrades (ARB 12v fridge and air compressor) that will require a few modifications to the vehicle’s electrical system in order to be used to their full potential; this will take the form of a power distribution system. I also have some future gear installs that will take advantage of this power distribution setup; these additional modifications were planned for accordingly while developing this kit. Links to the fridge and compressor installs here:

ARB Fridge/Freezer (50 Quart):

ARB 12v CKMA12 High-Performance Compressor:


My goal with this power distribution upgrade is to make a bolt-on system that does not in anyway damage or modify the OEM electrical system - no cut wires/cables, etc.; and beyond a few strategically placed mounting holes, this whole setup is 100% reversible. I want this system to be simple, modular, accessible, and comprised with over the counter components that can be purchased at a marine supply store or Amazon for ease of maintenance in the future.

Teaser photos of the final installed system:
Image
Image


—-

Battery upgrade:

The first thing I tackled was the vehicle’s OEM lead acid battery. Though it’s not a bad battery at all, it simply does not have the performance characteristics of an AGM unit. The fridge/freezer and ARB Linx both have a continuous low amp draw and the battery will be expected to power the fridge/Linx while the vehicle ignition is off, sometimes for hours or even days at a time. The 12v compressor on the other hand will pull up to 40 amps while running for several minutes at a time. In both of these use cases, an AGM is better suited to handle the job - while also being more shock and vibration resistant.

First, removing the OEM battery is fairly easy. Remove the plastic trim cover in the passenger rear quarter panel. The battery bracket is held down with a 10mm bolt and a 10mm nut. I believe the battery terminal bolts are 10mm as well. I found some painters tape useful to secure the battery terminals/cables after pulling them out of the way in order to remove the OEM battery.

Image


For a replacement unit I purchased a DieHard Platinum AGM at Advanced Auto Parts. The unit has a three year warranty and AA franchises are all over the country if a warranty claim or replacement needs to be sourced. As a H5-sized battery (OEM size), this unit is a direct swap, drop-in unit.

Product info here:

Specs:
H5 Group Size
680 CCA
850 CA
60 Amp Hour Capacity


As a bonus, our other Toyota, an AWD RAV4 Hybrid, uses the same group side battery, so I’ll drop this practically new OEM lead acid unit from the Sienna and turn in the RAV4’s four-year-old battery for the core deposit.

*Note that I did try to upsize to a H6 AGM from Batteries+ (their X2Power battery line), but the van’s OEM battery bracket was too small, and I felt the weight of the H6 might place too much stress on the bracket (if it were modified to accept the H6) and the corresponding sheet metal protrusions that support the bracket itself.

More info on that here, with lots of detail:

I upgraded the Diehard AGM with a set of SDHQ billet aluminum battery terminals, found here:
SDHQ Built Complete Billet Battery Terminal Kit

These terminals are designed for offroad, high vibration applications and accept Toyota battery cables and have several threaded inserts (with matching hardware) for additional positive and ground connections - perfect for what I want to do.

Photos of the new battery (with terminals) here:
Image
Image


*I did have to notch the positive terminal isolation cover in order for the OEM positive cable/1500w inverter power cable to slide in and sit flush along the top of the battery terminal.
Image

Image
Image


You’ll notice that a BlueSea dual-post MRBF fuse holder was also added to the positive SDHQ battery terminal. This product allows for two constant hot circuits to be branched off of the battery’s positive terminal - and with a 300A rating, it’s overkill for my application. My plan is to add two 40A circuits via this fuse block; one powering a smaller constant hot BlueSea fuse panel and the circuit the ARB 12v compressor.

Product info:

I then modified the OEM battery hold-on bracket to accept a Victron Smart BatteryProtect (65 Amp Model) and a BlueSea Systems 4-circuit Fuse Panel.

Product info here:
Smart BatteryProtect - Victron Energy


Photos of the modified bracket with the Victron and BlueSea products bolted up.

Image
Image


The Victron Smart BatteryProtect is a cool piece of kit. The “smart” designation simply means it is Bluetooth enabled and can therefore connect to any Bluetooth compatible device via Victon’s app. The BatteryProtect allows me to not only monitor the charge status of the van’s starter (now AGM) battery, but it will also open the circuit, thus deactivating all accessory circuits in the event the starter battery’s voltage drops below a certain threshold (that I designate - say 11.8v). It will also prevent the circuit from closing (becoming active again) until the 12v starter battery’s state-of-charge again reaches a certain higher threshold, say 12.2v. Hence, the BatteryProtect moniker. This unit is great peace-of-mind when adding additional electrical circuits - especially constant hot, always powered, circuits like the ARB Fridge and Linx.

The BlueSea 4-circuit panel (constant hot) will power four additional constant hot circuits:

1) Cargo LED work lights (5 amps), which I plan to mount on the underside of the rear hatch.
2) ARB 12v fridge freezer (10 amps)
3) Painless Cirkitboss ignition hot 3-circuit fuse panel (15 amps)
4) ARB Linx vehicle accessory interface (10 amps)

*all of these accessories will have a max draw of 40 amps if every circuit was powered at max draw. I'm going to run a 30 amp fuse first, as that's what I have on hand and it doesn't hurt to keep the fuse a small as possible.

—-

Continued here in Part #2:
 
#24 · (Edited)
Rear power distribution system install (Part #2):

Once the new AGM battery, BlueSea MRBF dual fuse holder, Victron Smart BatteryProtect, and BlueSea four circuit (constant hot) fuse panel were installed, it was time to build some 6 AWG cables to connect the Victron and BlueSea fuse panel to the battery. Easy stuff.
Image


I really like using this expandable wire sleeve (as seen previously in the phone mount / ChargeIt! front power distribution project) - which can be purchased via Amazon via various retailers in a myriad of sizes. It does a great job as a conduit/protector for power cables/wires and, due to its perforated construction, it also breathes and doesn’t trap heat within the cable/wire, which is great for keeping the cables cool in order to reduce current resistance. Some heatshrink tubing at each end results in a very professional final product. I use this sheathing almost exclusively throughout this project, and other electrical modifications throughout the vehicle.

I then grounded the Victron unit to the negative battery terminal. The Smart BatteryProtect is now powered and live. Here’s a screenshot from the IOS Victron mobile application:
Image


I can monitor the van’s 12v battery from up to about 50’ away and even remotely disconnect the BlueSea four-circuit (and by extension all rear mounted accessories - minus the ARB 12v compressor - at the click of a button); this is a great feature for conducting hard resets of Bluetooth accessories or to kill the circuit when replacing fuses, or adding additional accessories, etc. And the BatteryProtect unit is currently set to open the circuit if the 12v starter battery's voltage drops below 11.8v and then close it when the voltage again reaches 12.2v. I'm going to keep this setting for awhile and see how it goes.

I fabricated a mount (from 1” aluminum flat stock) for the three-circuit (ignition hot) Painless Cirkitboss fuse panel - which will mount via one of the battery grounding strap bolts. There’s a space between the battery and rear OEM fuse panel - along the back of the rear passenger side wheel well - where this accessory fuse panel can be shoehorned into position. Out of the way, yet accessible.
Image
Image


Product info regarding this specific Cirkitboss unit - note that Painless Performance manufacturers several different models with up to seven circuits and various combinations of constant and ignition hot outputs:


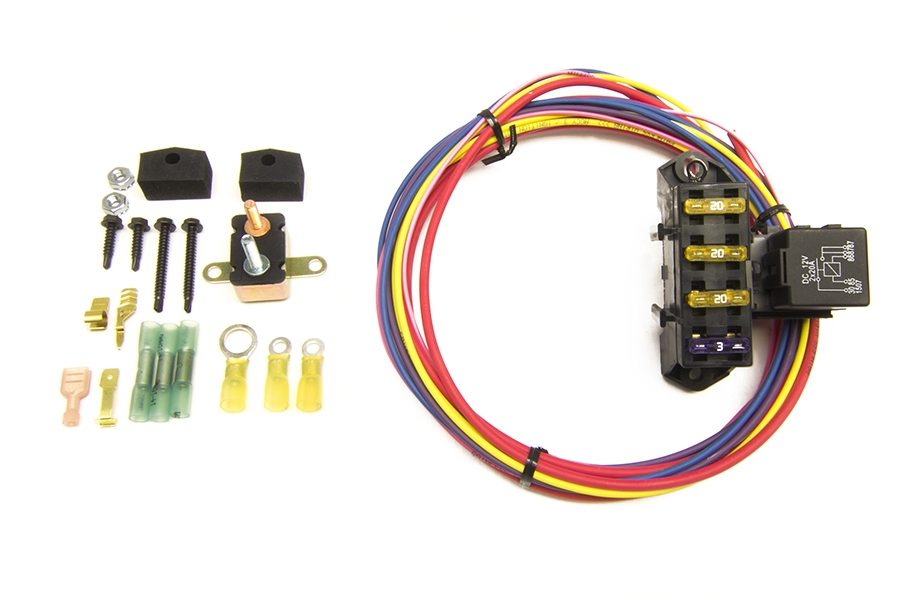
The Cirkitboss has three ignition hot circuits (which I will cap at 5 amps each); the circuits will power:

1) WeBoost Drive Reach cell signal boosters (yellow wire)
2) Linx 12v accessory/ignition feeder circuit (this will inform the Linx that the vehicle's ignition is on) (blue wire)
3) Linx TPMS receiver unit (for monitoring the TPMS sensors of a future travel trailer) (purple wire)

Photo of the fuse/circuit reference label I made for the inside of the battery compartment cover:
Image


I used a Weatherpack 3-circuit quick disconnect for the outbound wires and routed the pink ignition feeder wire to the small 12v OEM fuse panel inside of the rear passenger wheel well. This pink wire triggers the Cirkitboss’ 12v relay when the tapped circuit is energized. There are several unused circuits in the OEM rear wheel well panel - some are ignition hot (which I tapped into via a fuse piggyback add-a-circuit - similar to my ChargeIt! power unit install at the front of the van). Interestingly enough, there is a circuit within this fuse panel labeled "Cooler", I guess this was a holdover from the planned front console drink cooler that never made it into the final iteration of the 4th Gen Sienna; which I remember reading about in early press releases. Our previously owned Land Cruiser had this console cooler and it was useful for long road trips.
Image


At this point, the rear power distribution system is complete and ready to power some electrical accessories. It's a lot of kit to pack into such a small space, but I think it turned out alright. It's clean, organized, and safe system. This setup will last as long as the van and is ready for many years of use:
Image
 
#25 · (Edited)
ARB Classic Series II Fridge/Freezer install (Part #2):

I test mounted my 50-quart ARB fridge/freezer a couple of months ago as a proof of concept, here:

Traveler - The Family Hauler/Roadtrip Van

This was done as a feasibility exercise to:
1) verify if the fridge would fit on top of the right/passenger side 1/3 of the third row seat when it was folded down.
2) assess if the OEM rear tie-down and third row seat attachment points could be utilized to secure the fridge via its supplied tie-down strap system.

...a 'yes' was the answer to both questions

Once the rear power distribution system was installed, I began scouting a location to install a constant hot, flush-mounted power port for the fridge. I settled on the area just to the right of, and visually inline with, the rear OEM fuse panel access door; I then grabbed a 1 1/8" hole saw, took a deep breath, measured twice three four times, and cut once.

The result:
Image


I then fabricated an 8 AWG wire harness. From an electrical standpoint, the great thing about the above selected location for the port is that it is very close to the power source (the 12v battery) and therefore, the beefy 8 AWG wire harness can be kept very short to prevent as much voltage drop as possible from the battery to the fridge. The positive cable was routed to one of the output circuits on the 4-circuit, constant hot, BlueSea fuse panel and terminated with a 10 amp fuse. The negative cable was routed to the negative BlueSea bussbar on the 12v battery's negative terminal. The final product installed:
Image
Image
Image
Image


Now I have a constant hot / always powered 12v port for the fridge - no more powering it via the vehicle's ignition-dependent 1500w inverter (which is overkill for the fridge and must be manually turned on with each start-up of the van) - the inverter also does not power the fridge when the van is turned off, not good.

The new power port is a much more simple and discreet solution. When the fridge is removed and unplugged from the vehicle, the dust cover can then be inserted into the port.

The port's location and the van's rear passenger seat belt do a great job concealing the modification. The port is one of the few clues to a casual observer that any aftermarket work has been performed to the rear portion of the Sienna - which is an OEM, non-modified appearance that I like. The port's flush design also means that the van's cargo space is not impacted, so there's no risk of a snag point when moving large bulky items (like a piece of furniture) in and out of the van.
Image
Image


With the new deep-cycle 60ah AGM 12v starter battery and after some rough math, I suspect the fridge can be powered for 2-3 days at a time during moderately warm weather via the 12v battery alone - this is before the 12v battery's voltage reaches 11.8v and the Victron BatteryProtect automatically kills the circuit to preserve enough 'juice' in the battery to allow ignition/initiation of the van's start-up sequence (and to also protect the battery itself). A 3-day run time on battery power alone is the max use case I have for the fridge in the Sienna, so it should function well.

These 12v "overland-style" fridges consume just a couple of amps when the compressor is running and their efficient, well-insulated design limits the compressor's runtime as much as possible once the desired temperature is reached. I look forward to reporting back with some real-world data.

For anyone considering this modification, I greatly recommend it. A cold fridge is a very convenient addition to any road trip as it makes eating healthy and roadside picnics much easier.
 
#26 · (Edited)
ARB CKMA12 high-performance 12v compressor / Linx Vehicle Accessory Interface install (Part #3):

I finished the compressor / Linx install a couple of weeks ago and am just now getting around to posting an update. The area behind the spare tire bracket was very confined, so I installed an ARB external air manifold on the side of the bracket in order to provide enough room to mount the Linx pressure control and air suspension isolation solenoids.

There is a lot of unused dead space to the right of the bracket and above the wheel well, so this manifold takes advantage of that void. The manifold and airline from the compressor have the added benefit of being a thermal sink for the compressor to help dissipate heat when in operation. I aimed the solenoid output ports down to make routing the outbound air lines easier.

After that, all that was left was to wire the solenoids to the Linx terminals and fabricate/route the 6 AWG power / negative cables from the compressor to the 12v relay. I opted to not use the supplied ARB 40 amp relay and instead picked up a bigger (120 amp - I think) 12v relay off of Amazon. Its post terminals made for a cleaner attachment point for the 6 AWG cables.

I installed an Anderson quick disconnect for the 6 AWG cables, a dual Weatherpack connector for the Linx power and accessory/ignition hot wires, and a 1.5’ USB 2.0 data extension cable. The idea is to maintain the ability to remove the entire spare tire bracket as one unit with the air compressor / Linx system attached. I want to make servicing this system as easy as possible in the future. Unplug a few cables, unhook a few airlines, remove four bolts, and the entire system lifts out of the van for inspection and maintenance.

Plenty velcro tape, zip ties, and looped cable clamps made the wire management easy.

This was a very labor intensive endeavor - I would say that I have about 30 hours or so into this air compressor project. I probably wouldn’t undertake it again, due mainly to the level of work involved, but the final product works flawlessly and looks pretty good as well. I had about 2/3 of these parts NIB from picking them up over the past few years during sales events or when I found them for sale by owner. The original plan was to install everything in my previously owned Land Cruiser, but the Sienna will do :cool:🤙

Photos of the finished air compressor / Linx system:
Image
Image
Image
Image
Image


I removed the grey sound dampening material inside the rear quarter panel as the manifold’s metal braided airline contacted it no matter how I adjusted the compressor output and manifold input ports. This airline gets rather hot when the compressor is cycling, so I opted to play it safe. I may investigate some thermal insulation (Thermotec) for the airline in the future, if inclined. However, I doubt the acoustic impact (from road noise) inside the cabin will be significant, especially with the spare wheel and tire mounted - they'll perform a similar function.

I have yet to decide where to mount the compressor’s output air coupler/chuck. It will likely be somewhere on the bracket where it can be conveniently accessed through the spokes of the spare tire/wheel. More to follow in the future. But for now, I tucked the air coupler next to the trailer light power module - not pictured in this thread, but I did post a photo at the bottom of my next thread entry.

The modified bracket mounted in the van.
Image
Image
Image
Image


Cable quick-disconnects tucked out of the way behind the OEM trailer wiring harness module.

The 6 AWG wire harness can also be seen in the below photo as it routes into the back of the trunk area of the van. I tucked it under the rear cargo trim and carpet, past scissor jack case, and up under the right rear quarter panel trim directly to the MRBF fused terminal (for the positive) and the negative battery terminal for the ground cable. You can see in the above photos that the BlueSea negative bussbar (next to the Linx control unit) acts as a common ground for the Linx, solenoids, 12v relay, and the compressor itself. The black/negative 6WG cable grounds that bussbar to the battery for a secure connection - I try to avoid body grounding points when possible.
Image

EDIT: additional photos of the Linx install can be viewed here:
My next post will detail the Linx control unit (screen) install. I’ll try to get that posted in the next day or two.
 
#27 · (Edited)
ARB CKMA12 high-performance 12v compressor / Linx Vehicle Accessory Interface install (Part #4):

Once the compressor and Linx were installed and bench tested with the control unit, it was time to install the control unit’s gimbal mount in the front of the cabin.

Here’s a stock photo of the gimbal mount attached to the back of the control unit. This angle gives you an idea of the design which I’ll expound on a bit more below:
Image


The Linx control unit is a sterilized Android phone, sans SIM card, in a custom case with a magnet compatible disc on the back. It attaches to the Linx gimbal mount via four powerful buttonhead disc magnets on the mount itself. The gimbal mount is sturdy and rotates around a ball socket to place the screen at the best angle possible in relation to the driver. The control unit connects to the Linx via a USB 2.0 data link cable - the supplied 6’ cable was not long enough to reach the Linx at the rear of the vehicle, so I extended it with a 10’ extension cable found via Amazon. The 10’ extension was just long enough to reach the Linx with no slack to spare. I wrapped the USB cable in flexible conduit and ran it behind the front kick panel, under the drivers front and sliding door sill trim, and behind the left rear quarter panel trim - securing it along the way with velcro cable management tape.

The other cool feature of the control unit is it is Bluetooth enabled, which allows it to connect to the Linx wirelessly as a redundant form of communication if the USB cable fails. The control unit can also be detached from the mount and removed from the vehicle to visually observed actions like the inflation of rear airbags from outside the vehicle to ensure the appropriate amount of chassis leveling is achieved - very helpful. It also allows the control unit to be detached and stored outside the vehicle for safekeeping when the vehicle is parked for long periods of time.

I decided to mount the control unit below the radio on the flat, “storage ledge” to the left of the wireless phone charger. Some high-strength 3M molding tape was applied to the bottom of the mount and the base secured to the trim piece, flush with the vehicle’s data USB port.
Image
Image


Connected and in operation:
Image


* I also installed a ScanGauge II vehicle diagnostic unit to the right of the Linx control unit; more on that here:

The following photos showcase some of the Linx functions that I have enabled. Two functions can be viewed at any given time via a swipe up or down on the screen. Currently I utilize the Linx to view:
  • Calendar/clock
  • Speedometer/altimeter
  • Starting battery voltage
  • Fridge temp and status
  • Compressor / pressure control
  • Air suspension (airbag) control
  • Trailer TPMS
* note the air suspension and trailer TPMS monitoring functions are not yet fully operable - they are in preparation for future Firestone rear suspension coil airbags and a small camping/travel trailer.

Image
Image
Image
Image
Image


This concludes the compressor and Linx install. The only real loose end that I need to tie-up is where to mount the compressor’s air coupler/chuck. At this point, I have it tucked in the gap between the spare tire and the bottom of the spare tire access panel.
Image


I’ll keep mulling this one over, as I haven’t settled on a suitable location for a permanent install...

EDIT: external (rear bumper mounted) air coupler install write-up here: https://www.siennachat.com/threads/traveler-the-family-hauler-roadtrip-van.72969/post-465280

…and the secondary (interior - under front passenger) air coupler install write-up here:
 
#28 · (Edited)
Modern Spare 145/85R18 wheel and tire:

Once the compressor / Linx install was complete and I knew that I wouldn’t be pulling the spare tire bracket out of the vehicle for awhile, I decided to finally install the spare tire.

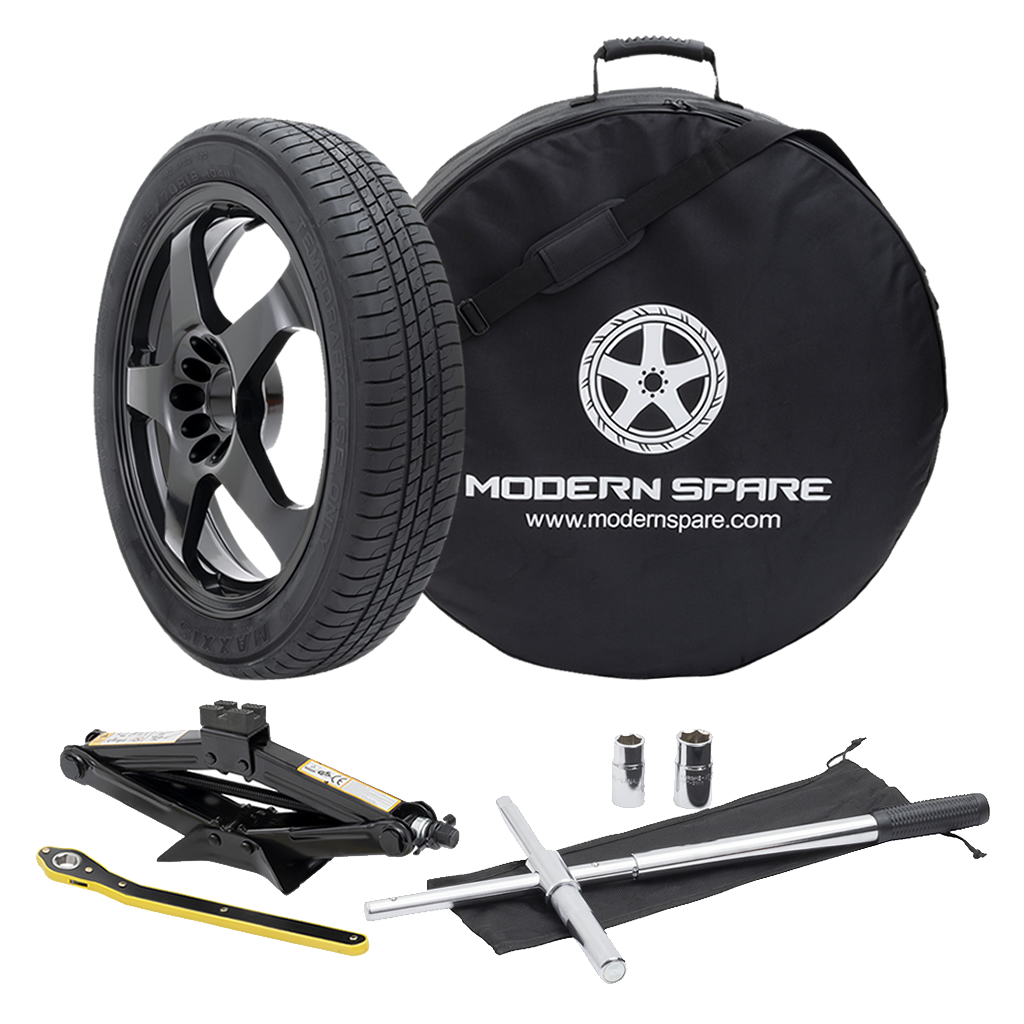
I opted for the Modern Spare 145/85R18 (27.7”) wheel/tire combo (wheel and tire only, no carrying bag or jack assembly). Product link below - this is actually their Gen 3-specific Sienna spare tire; it just so happens to fit in the Gen 4 spare tire compartment, unlike their Gen 4-specific wheel/tire - which is designed to stowed flat in the rear “trunk”.


I’m a fan of this Modern Spare unit over the OEM offering for several reasons:
  • The 27.7” diameter is bigger than the OEM spare and closer to the main/running tire size. This results in less drivetrain wear and tear when running the spare.
  • The wheel spokes align better with the spare tire bracket and allow for improved access to the area behind the wheel, manual fuel door release, air compressor air line output ports (at the solenoids), and the air compressor filter housing (for filter cleanings).
  • The 18” wheel is larger and affords more storage space behind the wheel.
Big thanks to @Goolong for pioneering this wheel/tire choice in this thread (some good discussion within):


The wheel/tire unboxed:
Image
Image


Final install - with the lower plastic spare tire support brace (not sure what to call it) in place. My assumption is this device supports some of the spare tire’s weight and minimizes vibration of the spare during highway travel - which I would think reduces the stress placed on the bracket’s mounting points/tabs.
Image


I can confirm that this wheel/tire fits - barely. You can see below that there is not much room left in the spare tire compartment - 27.7” is a great match.
Image
Image
Image
Image


Some shots of the compressor components that are visible and accessible (thanks to design of this 18” wheel) with the spare tire in place - it’s nice to know I can clean the compressor’s filter or disconnect/reconnect the press-fit airlines without removing the spare:
Image
Image


Storage space behind the wheel:
Image


The spare tire cover/lid snaps on; however there is one clip (at about 5 o’clock position - near the lower seat belt attachment point) that doesn’t fully seat. The result is that area of the cover is lifted off the trim panel about 1/8”-1/4”; not a big deal, and I may investigate this further to see if I can remedy the issue. But at this point, the cover otherwise seats well, doesn’t rattle, and serves its purpose. IMO, it’s a minor inconvenience to fit a bigger, more functional spare tire/wheel combo like the Modern Spare unit.

EDIT: The above issue with the lid not fully seating was addressed by lowering the inflated pressure of the spare tire from 60 PSI to 55 PSI. Only a 5 PSI drop, but it was enough of a reduction in the size of the spare tire to reduce its width by a millimeter or so. Now the cover fully seats and snaps into the trim panel as it should. Problem solved.

Photos of the lid to follow in my next post (photo limit reached).
 
#29 · (Edited)
EDIT: the below issue with the spare tire cover/lid not fully seating has been resolved. See bold font note at the bottom of the previous post - BLUF, reducing the spare tire’s pressure to 55 PSI was the solution.

As mentioned above, shots of the spare tire cover/lid and the non-engaged tab in question (with the corresponding gap):
Image
Image
Image
Image
Image


I took advantage of the aforementioned storage space behind the wheel to store my tire changing mat (Overland Tailor Dirt Nap Tarp). This is simply a coated vinyl mat to keep you out of the mud and road grime when changing a tire. It’s also a good impromptu picnic blanket or baby changing mat. It’s stores easily and has its own integrated straps/clips. I do not think Overland Tailor makes these anymore and it’s a shame, as it’s a great product.

But before I slid it into this gap, I capped all of the exposed bolt threads with rubber bolt covers to remove the sharp, abrasive edges:
Image


Tarp stowed in the gap:
Image
Image


The battery/power management upgrade I mentioned a few posts back prevented me from reinstalling the jack handle/crank and lug wrench on the backside of the battery compartment access panel - they hit the BlueSea fuse panel and kept the battery panel/lid from fully closing. So I rolled both items up in the Tarp for safe keeping and rattle-free storage. A clean solution.
Image


And that’s it - spare tire installed. I feel much better knowing it’s back there, especially for those longer trips.