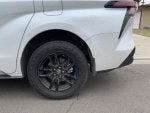
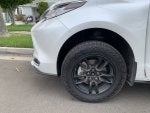
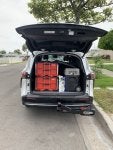
I’ve been considering either the Journeys Offroad (JOR) 2” or 3” lift for my 4th Gen Sienna.
Product webpage:
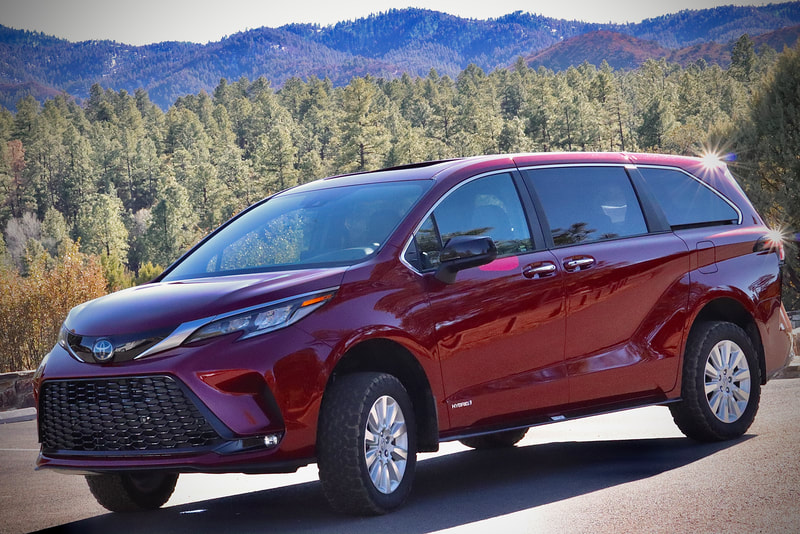
![Image]()
There are a handful of threads in the 4th Gen forum regarding this lift - I’d like to start an all encompassing thread that not only lists all of these existing resources, but also captures in a single place as many photos and as much info as possible regarding the lift - specifically before/after install photos, installation pricing/info, and general user feedback. I think a thread like this would be very helpful for Sienna owners like myself who are considering installing this lift and are trying to make a well-informed decision.
—-
4th Gen JOR lift owners - if you could follow the below general format (my example responses in italics) in your initial post to this thread, I’d appreciate it. This will allow you to showcase your modified Sienna and should preemptively answer a lot of questions from prospective JOR customers.
Example:
—-
Existing JOR thread list
Below is a list of existing threads that discuss the 4th Gen JOR Lift Kit. If I missed a thread, or if another one pops up, please let me know and I’ll add it:

 www.siennachat.com

 www.siennachat.com

 www.siennachat.com

 www.siennachat.com

 www.siennachat.com

 www.siennachat.com

 www.siennachat.com

 www.siennachat.com
—-
Thank you in advance to the community for your help and support. If anyone has a suggestion to improve this thread, please let me know. I welcome the feedback.
-Steve
Product webpage:

2021+ 4th Gen Sienna Lift Kits
Check below for photos and downloadable instructions for the installation of the 2021-2025 Toyota Sienna Hybrid - 3" Lift Kit.
www.journeysoffroad.com
There are a handful of threads in the 4th Gen forum regarding this lift - I’d like to start an all encompassing thread that not only lists all of these existing resources, but also captures in a single place as many photos and as much info as possible regarding the lift - specifically before/after install photos, installation pricing/info, and general user feedback. I think a thread like this would be very helpful for Sienna owners like myself who are considering installing this lift and are trying to make a well-informed decision.
—-
4th Gen JOR lift owners - if you could follow the below general format (my example responses in italics) in your initial post to this thread, I’d appreciate it. This will allow you to showcase your modified Sienna and should preemptively answer a lot of questions from prospective JOR customers.
Example:
- Trim level: Limited AWD
- Model year: 2022
- 2” or 3” Lift: 3”
- Wheel/Tire model and size installed: OEM Wheels P235/60R18; no wheel spacers
- Shop that conducted the install w/ location (if applicable): Joe’s 4x4 Shop - Denver, CO (ask for John); Joe’s is a JOR recommended installer
- Install labor/materials cost (if you mind sharing): $1,700 out the door
- Before lift install photos: (if you have them) *Photos inserted here
- Post lift install photos: (a few different angles would be helpful) *Photos inserted here
- User feedback / thoughts: Lost approximately 2 MPG per tank; glad I went with the 3” over the 2” - the added ground clearance is very useful; van body rolls a bit more in turns, but manageable
—-
Existing JOR thread list
Below is a list of existing threads that discuss the 4th Gen JOR Lift Kit. If I missed a thread, or if another one pops up, please let me know and I’ll add it:
2" Lift Install
Just got the Journey's 2" kit install done at HID Kit Pros in Bellevue, WA. Got my EcoHitch clearance from just about 9 3/4" to nearly 12"! After Photos (front, front wheel, side door kick sensor, rear wheel, eco hitch) all on passenger side. They had zero issues with alignment and did the...
New lift, wheels/tires and brush bar installed
Just had JOR 3” lift kit installed along with Fifteen52 Traverse MX 17x8 wheels/ 235 75 17 wildpeaks, and a Black Horse front runner.

Journey lift 2in clunk sound
Hi, I had an off road company install the journey 2” lift for my 2022 and immediately after driving off I started hearing clunking noise from front left driver side. It doesn’t seem to be speed related and not ditch or pot hole related. So it’s kind of random. I do believe at low speed maybe...

Spacer Lift Kits - RisingTuning? Journey's? Traxda?
Hello everyone, I am doing some research, as my wife and I are planning to purchase a new Sienna soon. We recently rented a 22' Toyota Highlander and quickly realized that although the car had a lot of good things to like, it lacks the room that we need for our growing family. The only thing...

Fuel economy with 2” lift kit.
I got a Journeys Offroad 2” lift kit on my AWD XLE installed last fall along with snow tires. I wasn’t sure how it would affect the mileage. I just finished my first tank with summer tires. This was mixed country driving with some city and some highway, and about 1/4 with a canoe on top. I...

Maximum Tire Diameter For 3 Inch Journeys Offroad Lift?
Hi Gang - Apologies if this has already been asked for the 4th gen forum, but I'm just about to invest in some all terrain tires after my 3 inch Journeys Offroad lift is installed and I wanted to make sure my tires will fit since I'm being told repeatedly by online retailers that they won't...

Ground clearance on the 2021 hybrid sienna
Hi trying to increase the ground clearance on the 2021 hybrid sienna for brief stretches of back roads that require a slightly higher ground clearance than stock. The last article I read from 2015 mentioned installing taller coils on the back but it wasn’t so easy on the front it said. Has...

Toyota Sienna Lift Kits>2021Toyota Sienna AWD -...
4th Gen Toyota Sienna AWD EV 3" Lift Kit (journeysoffroad.com)
—-
Thank you in advance to the community for your help and support. If anyone has a suggestion to improve this thread, please let me know. I welcome the feedback.
-Steve


